
Introduction to CRM #
The CRM module in Emeron ERP is designed to enhance customer interactions and streamline sales processes.
- Lead Management: Capture, track, and nurture potential leads through various stages of the sales funnel.
- Opportunity Tracking: Manage sales opportunities, track progress, and forecast potential revenue.
- Customer Management: Maintain detailed customer profiles, including contact information, transaction history, and communication logs.
- Activity Management: Schedule and track meetings, calls, and follow-ups to ensure effective customer engagement.
- Quotations and Sales Orders: Generate and manage quotes and sales orders to streamline the sales process and ensure accurate order fulfillment.
- Reports and Analytics: Access comprehensive reports and analytics to gain insights into sales performance, customer behavior, and CRM effectiveness.
The CRM module helps businesses improve customer relationships, optimize sales efforts, and drive growth by providing a unified platform for managing customer interactions and sales activities.
CRM MastersLead Source #
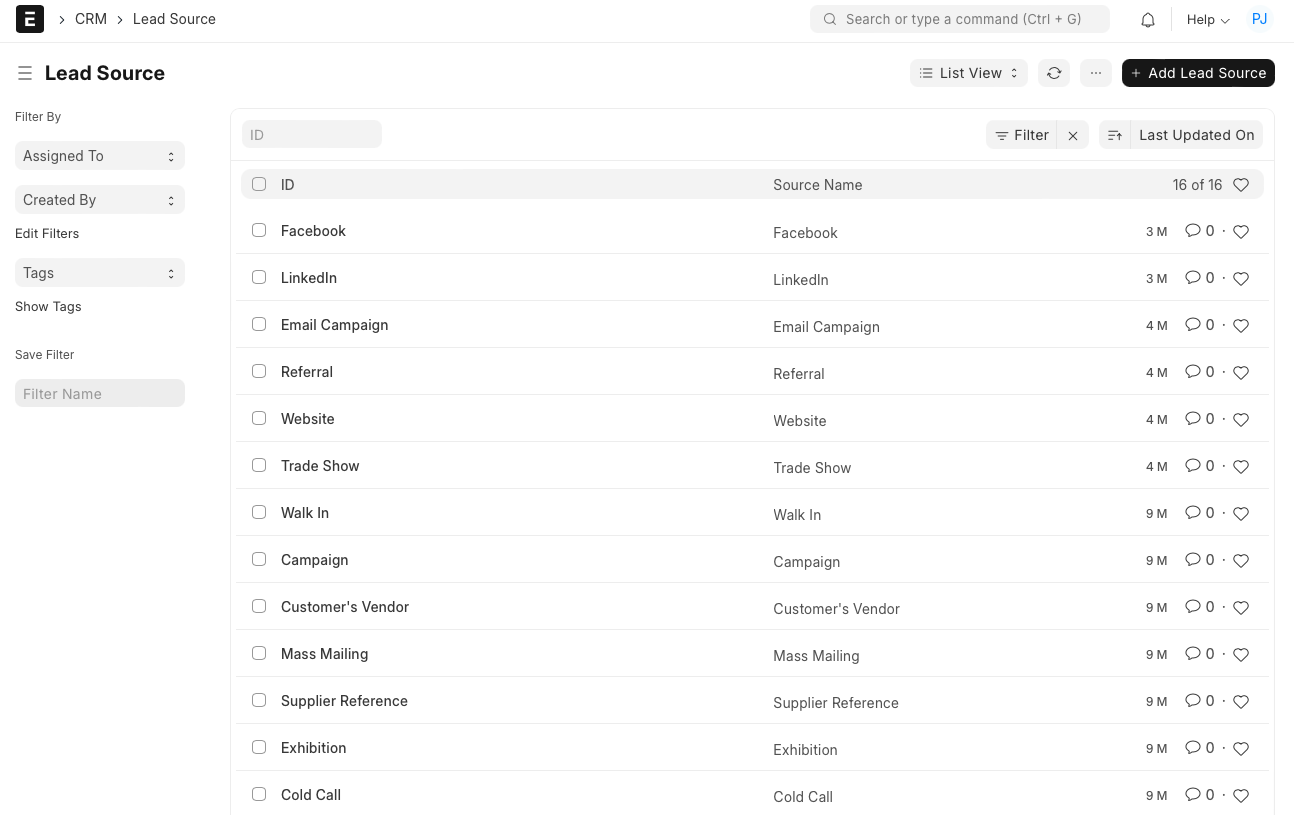
Lead Source is a channel through which the leads are generated.
It is important to track the source from which you are getting the leads. This will help in measuring effectiveness of various marketing campaigns and allocate the budgets accordingly.
To access the Lead Source list, go to:
Home > Selling > Settings > Lead Source
- How to Create a Lead Source
- Go to the Lead Source list, click on New.
- Enter ‘Source Name’.
- Enter ‘Details’ if you need to elaborate more on the source.
Typical lead sources are contact forms on your website, marketing campaigns, events, references, ads on social media etc.

The system will allow you to maintain a list of various lead sources leveraged by you.
Masters in CRM refers to the core data entities that are vital for managing customer relationships and sales processes in the system. These data elements serve as the foundation for various CRM activities and operations
By maintaining these core master data entities in CRM, users can effectively manage their customer relationship activities, streamline sales processes, track interactions, analyse overall performance, and make informed decisions to drive business growth and success.
- Territory
- Lead Source
- Sales Person
- Sales Stage
- Opportunity Type
- Contact
Opportunity Type #
‘Opportunity Type’ indicates the broad category of opportunity like Sales, Support, Maintenance, Partnership etc.
Adding the appropriate opportunity type helps in assigning the opportunity to the right sales executive and also categorise opportunities in different groups.
To access the Opportunity Type, go to:
Home > CRM > Settings > Opportunity Type
How to create an Opportunity Type #
- Go to the Opportunity list and click on New.
- Enter ‘Name’.
- Enter ‘Description’ to elaborate more on the type.
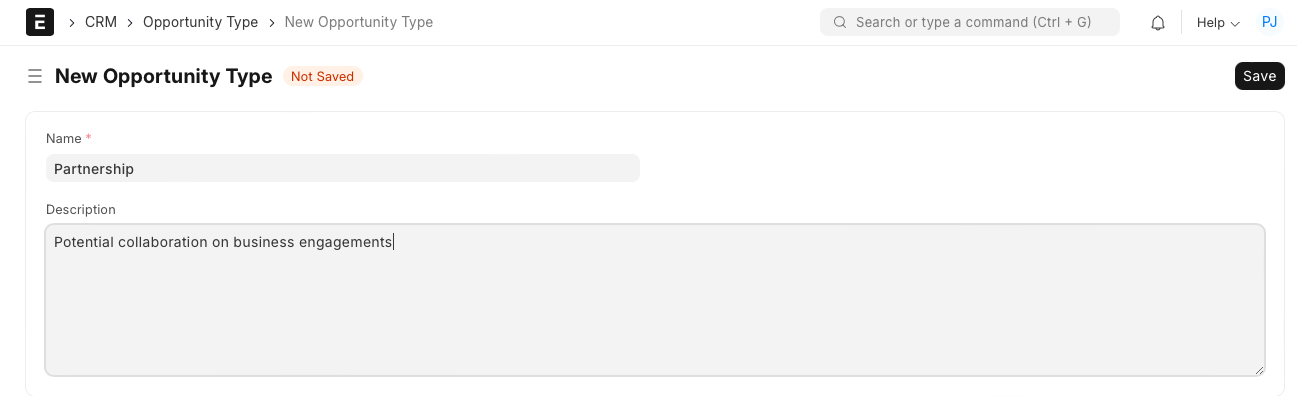
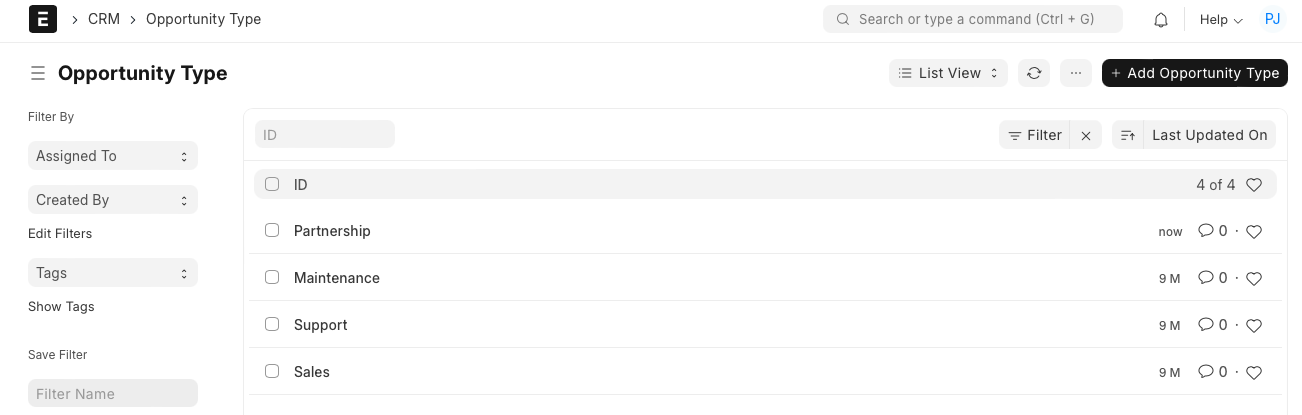
The system allows you to maintain a list of different Opportunity Types.
Campaign #
A Campaign is a full-scale implementation of a sales strategy to promote a
product or service.
In Emeron ERP CRM, a campaign refers to a structured marketing initiative aimed at achieving specific business objectives, such as generating leads, increasing sales, or promoting brand awareness.
The Campaign feature allows users to plan, execute, and monitor marketing campaigns effectively within the CRM module. By leveraging the Campaign feature in Emeron ERP CRM, organizations can streamline their marketing efforts, target the right audience with personalized messages, track campaign performance, and ultimately drive business growth through effective marketing initiatives.
This is done in a market segment of a particular geographical area to achieve specified objectives.
To access Campaign, go to:
Home > CRM > Campaign > Campaign
1. How to Create a Campaign #
- Go to the Campaign list, click on new.
- Enter a name for the campaign.
- Enter a description to describe what the campaign is about.
- Save.
2. Features #
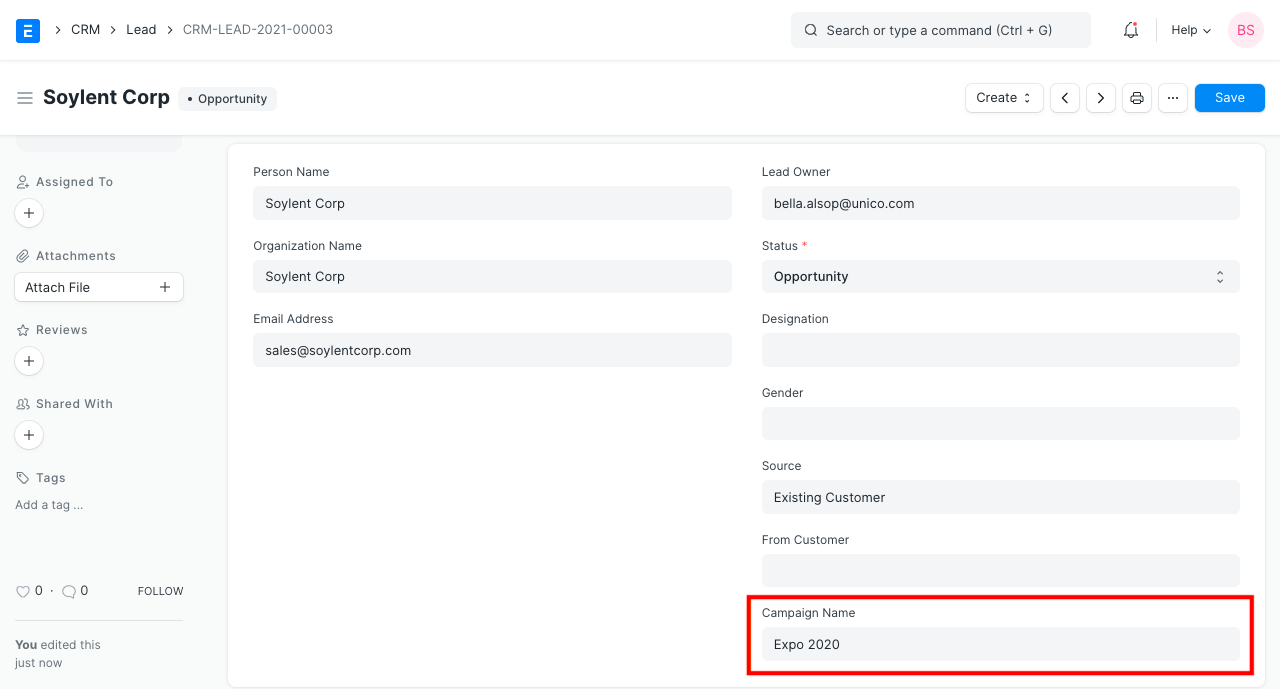
2.1 Tag Campaign in Lead, Opportunity, and Quotation #
When a marketing campaign generates a lead or an opportunity, you can tag the campaign while creating the Lead or Opportunity. You can also tag the campaign in Quotation.
This helps in assessing the effectiveness of a marketing campaign by calculating the return on investment.
2.2 View Leads Generated by a Campaign #
- Click on ‘View Leads’ button in the campaign. Campaign – View Leads
- You will see a filtered list of leads made against the campaign.
- You can also create new leads against the campaign by clicking on ‘New’ Campaign – New Lead
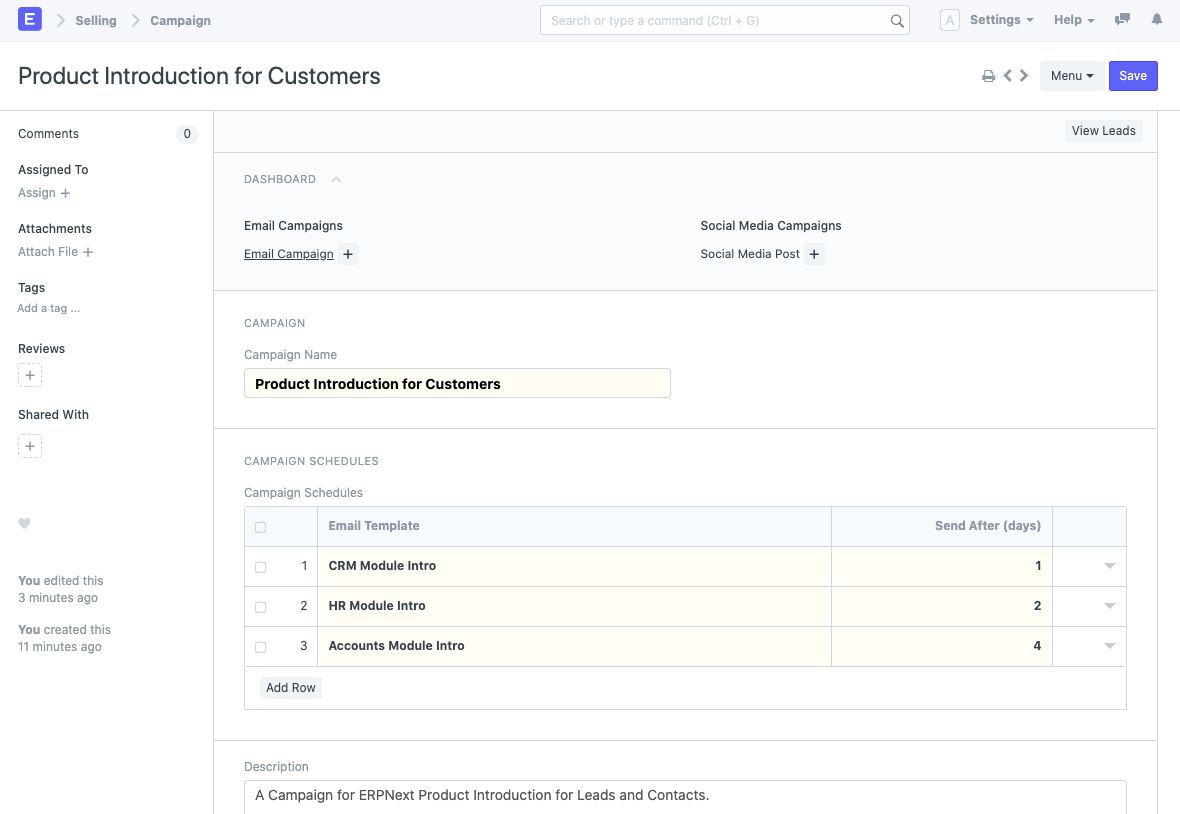
2.3 Set up email schedules for Email Campaigns #
If you want to carry out a campaign using emails for your leads or contacts, Email Campaign serves the purpose.
You will have to set up a schedule for the campaign. Click on ‘Add Row’ to add an entry to the campaign schedule.

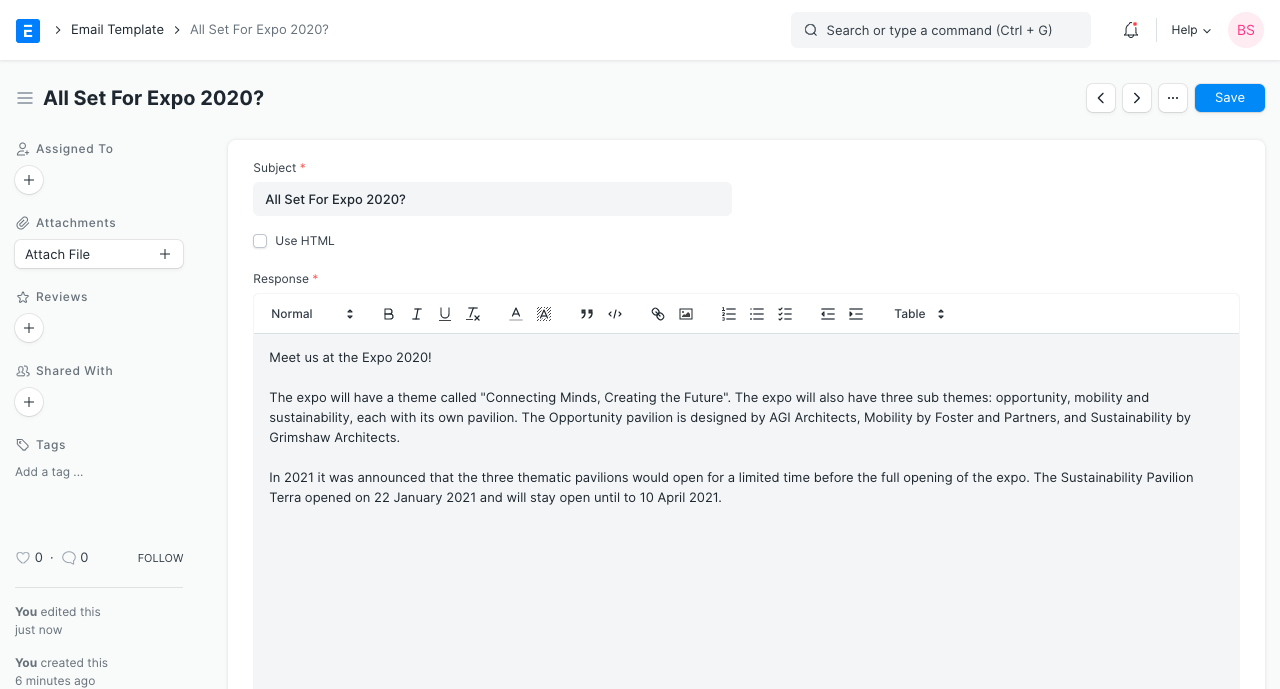
- In Email Template, select an ‘Email Template’ which you would like to send via email to the lead or contact. You can create one as follows:
- In Send After (days), specify the number of days after which the respective email should be sent. Using this field, the day on which email is to be sent is calculated relative to the Start Date of Email Campaign.
2.4 Dashboard #
The Campaign dashboard shows you all the Email Campaigns and Social Media Post linked to the Campaign. You can also create a new Email Campaign and Social Media Post from here.

3. Related Topics #
- Lead
- Opportunity
- Quotation
- Email Campaign
CRM Settings #
Introduced in Version 14.
CRM Settings allow you to configure your leads, opportunities, quotations and communication as per the business tules..
To access CRM Settings, go to:
Home > CRM > Settings > CRM Settings
Lead #

01. Campaign Naming By #
It ensures consistency in the naming convention used by the organisation by automatically generating names for new campaigns based on predefined rules or patterns. It helps users create and maintain unique campaigns and track their effectiveness.
2. Allow Lead Duplication based on Emails #
If this is enabled, the system will allow users to create multiple leads with the same email address at the same time.
3. Auto Creation of Contact #
The system will automatically create a new Contact on creation of a Lead.
Opportunity #

1. Close Replied Opportunity After Days #
If there are many Opportunities having a status other than Open, then they will be auto-closed after the no. of days mentioned in this field if there is no action.
Quotation #

1. Default Quotation Validity Days #
You can configure quotations to the customer to be valid only for certain days. In the Quotation, you can update Valid Till Date manually. By default, the Valid Till date is auto-set as 30 days from the Quotation’s Posting Date. You can change the no. of days in this field as per your business case.
Other Settings #

1. Carry Forward Communication and Comments #
If this is enabled, When converting a Lead into Opportunity and Opportunity to Quotation, the system will auto copy the emails and comments from the source document.
Lead #
A lead is a potential customer who might be interested in your products or services.
To get the customer through the door, you may be doing all or any of the following:
- Listing your product on directories.
- Maintaining an updated and searchable website.
- Meeting people at trade events.
- Advertising your products or services.
When you send out the word that you are around and have something valuable to offer, people will come in to check out your products. These are your Leads.
They are called Leads because they may lead you to a sale. Sales executives usually work on leads by calling them, building a relationship and sending information about products or services. It is important to track all this conversation to enable another person who may have to follow-up on that contact. The new person is then able to know the history of that particular Lead.
To access the Lead list, go to:
Home > CRM > Sales Pipeline > Lead
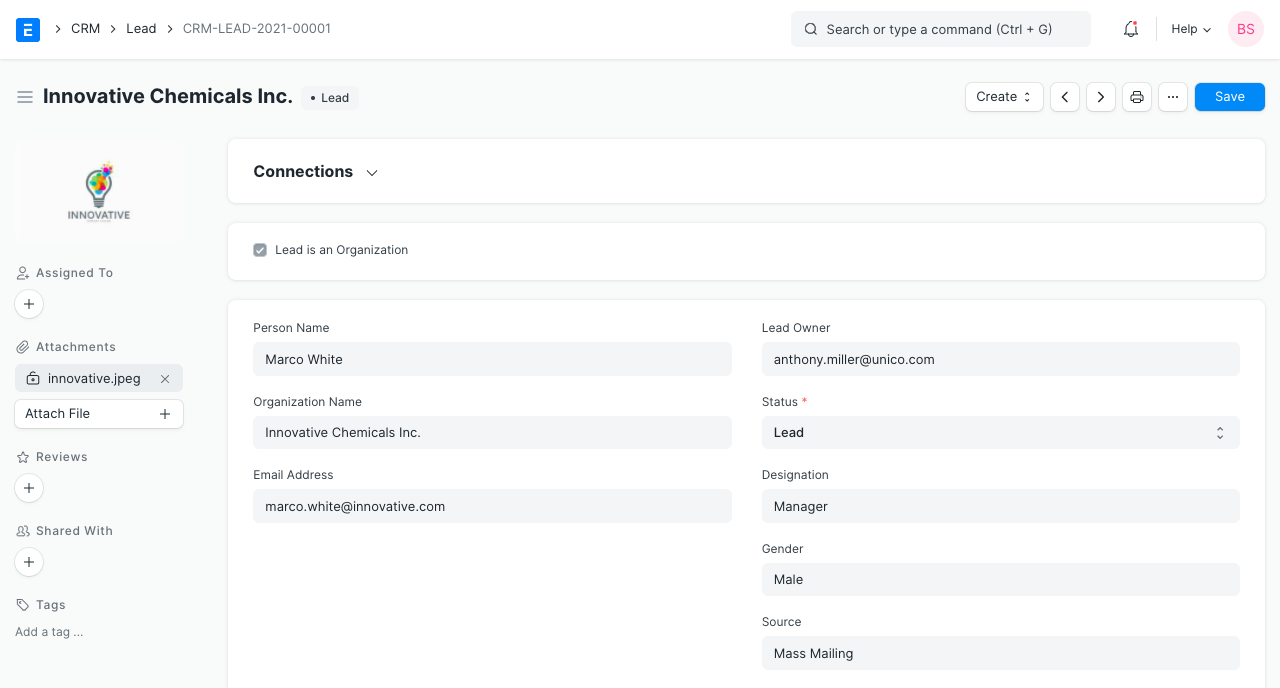
- How to Create a Lead
- Go to the Lead list and click on New.
- If the person represents an organization, check the ‘Lead is an Organization’ checkbox. Notice that when you check, the ‘Company Name ‘ field becomes mandatory. Enter the Company Name.
- If the person is an individual, leave the checkbox unchecked and enter Person Name and Gender.
- Enter the ‘Email Address’.
- Status is the important field in the Lead. You can set the status manually and also it will be updated automatically based on your actions against the lead.
- Lead: This is the default status assigned when a Lead is created and it indicates an action is needed against this Lead.
- Open: Sales executive needs to contact the Lead.
- Replied: A sales executive has provided the information needed and response from Lead is awaited.
- Opportunity: If an Opportunity is created against the Lead, the status is set to Opportunity. It indicates that the Lead is qualified and may lead to sales.
- Quotation: If a quotation is created against a Lead, then the status is set to Quotation.
- Lost Quotation: If the quotation given to the lead has been marked as lost, then the status is set to ‘Lost Quotation’.
- Interested: The lead is interested in the products or services.
- Converted: If the quotation given to the Lead has resulted in confirmation of an order and if the Sales Order has been created against the quotation, then the status is set to Converted.
- Do Not Contact: Lead is not interested and no further communication is needed.
- You can set the Lead Source in Source field.
- Enter email ID for communication.
- Click on ‘Save’.
You can also record the details of the conversation in the NOTES section.
Further details like Lead Type, Market Segment, Industry can be added in the ‘MORE INFORMATION’ section.
If you have a healthy number of leads, all this information will help you prioritize the leads you can pursue.
You can assign the Lead to a user by clicking on ‘Assign’ button on left bar. You can also attach files/images by clicking on ‘Attach File’ button.
- Features
2.1 Reminders to Follow Up on the Leads #
It is important to reach out to leads from time to time and build the relationship. You can create a calendar event from the Activities tab for the user and a notification will be shown on that date.
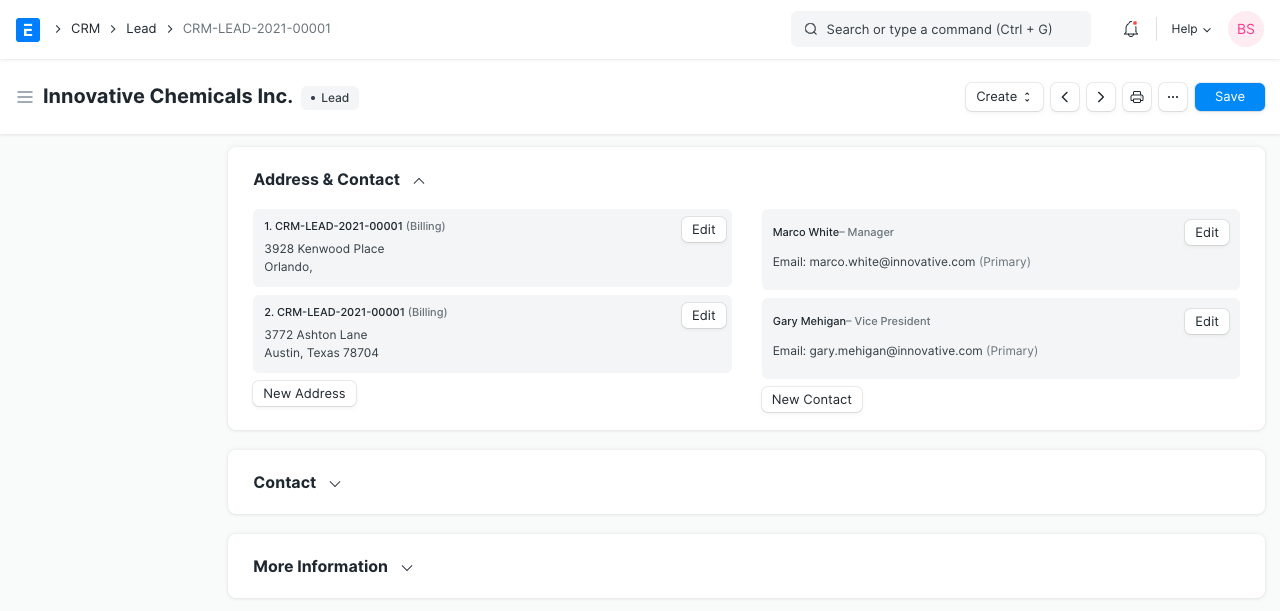
2.2 Adding Multiple Contacts and Addresses #
In Busines-to-business(B2B) scenario, in order to close a sales deal, you will have to contact multiple people working in the prospective company. You can add the details of all such people in the same lead. Once you save a Lead, you will get the option to add Contact details by clicking on ‘New Contact’ button. Similarly, you can add the Address details by clicking on ‘New Address’.
2.3 Recording Comments, Emails and Events #
- Comments: You can write your comment in ‘Add a comment’ box and click on ‘Comment’.
- Emails: You can send an email to the lead by clicking on the ‘New Email’ button and when the lead responds to your email, it will be appended to your email creating an email thread.
- Events: You can also records the Meetings, Calls etc you have had with the Lead by clicking on ‘New Event’
2.4 Creating Opportunity, Customer and Quotation #
You can create an Opportunity, Customer or a Quotation from the Make dropdown. Relevant field values will be copied over.
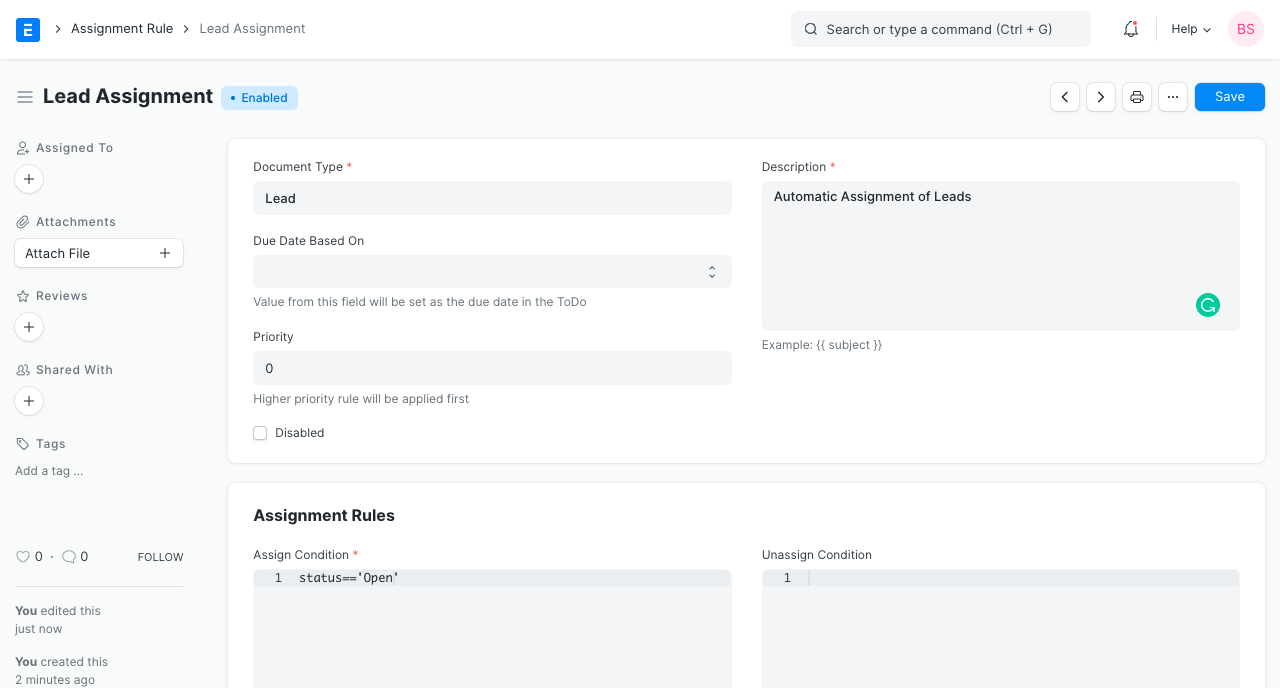
2.5 Auto-assigning the Leads to Sales Executives #
Introduced in Version 12
You can define Assignment Rules to automatically assign the leads to sales executives.
- Adding Custom Fields
You may need to add custom fields to capture additional details as per your needs.
You can customize the Lead DocType using Customize Form tool.
- Related Topics
Opportunity #
Opportunity is a qualified lead.
When you get a hint that lead is looking for a product/service that you offer, you can convert that lead into an opportunity. You can also create an opportunity against an existing customer. Multiple Opportunities can be collected against a lead or a customer.
To access the Opportunity list, go to:
Home > CRM > Sales Pipeline > Opportunity
1. How to Create an Opportunity #
- Go to the Opportunity list and click on ‘Add Opportunity’.
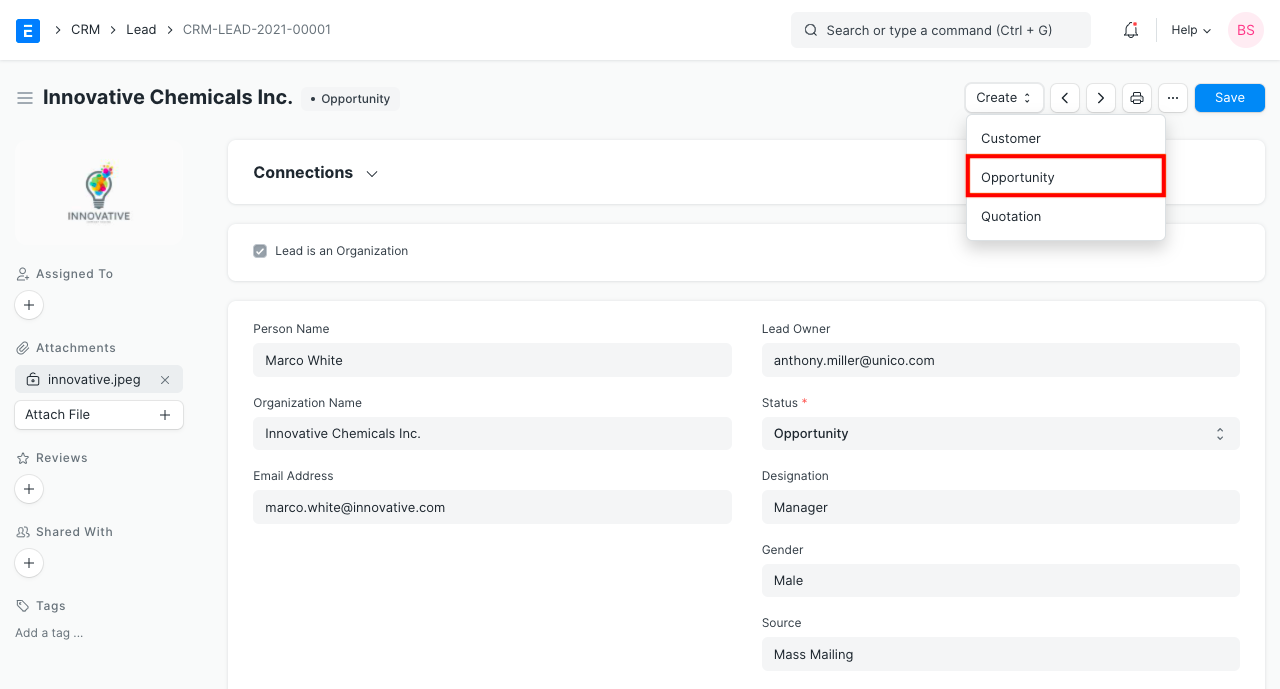
- In ‘Opportunity From’, select Lead if opportunity is from a lead.
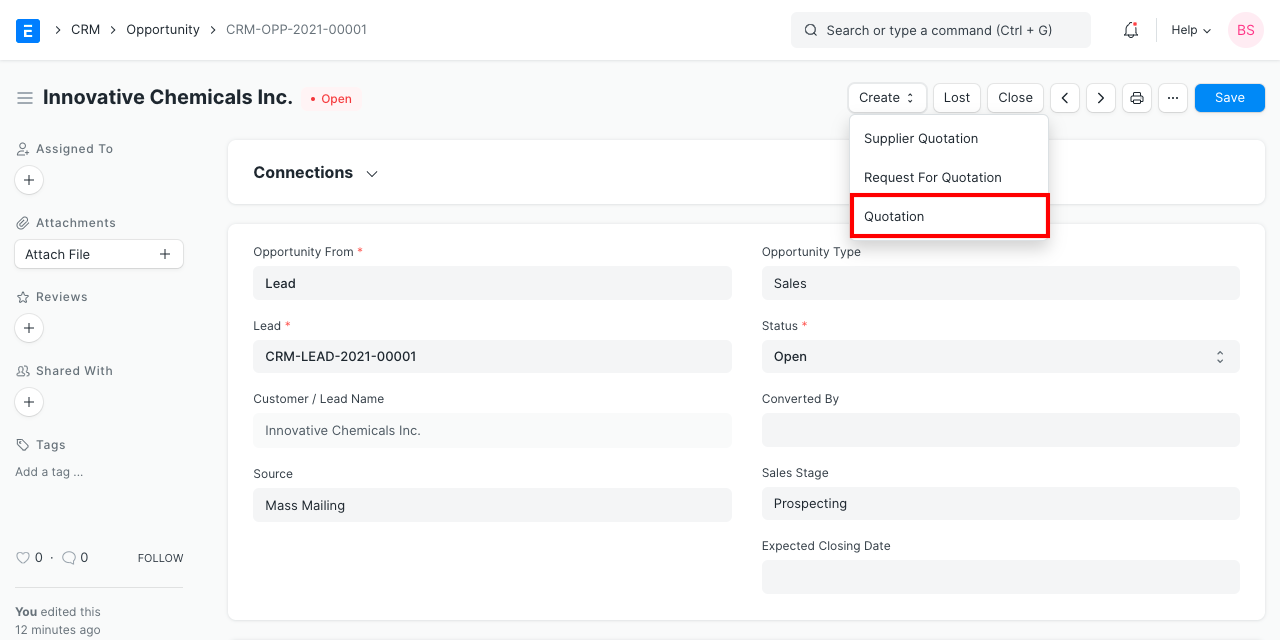
- You can also go to a Lead with ‘Open’ status and select “Opportunity” under Create dropdown as shown below.
- In ‘Opportunity From’, select Customer if opportunity is from a customer.
- Select Opportunity Type. This indicates the broad category of opportunity like Sales, Support, Maintenance etc.
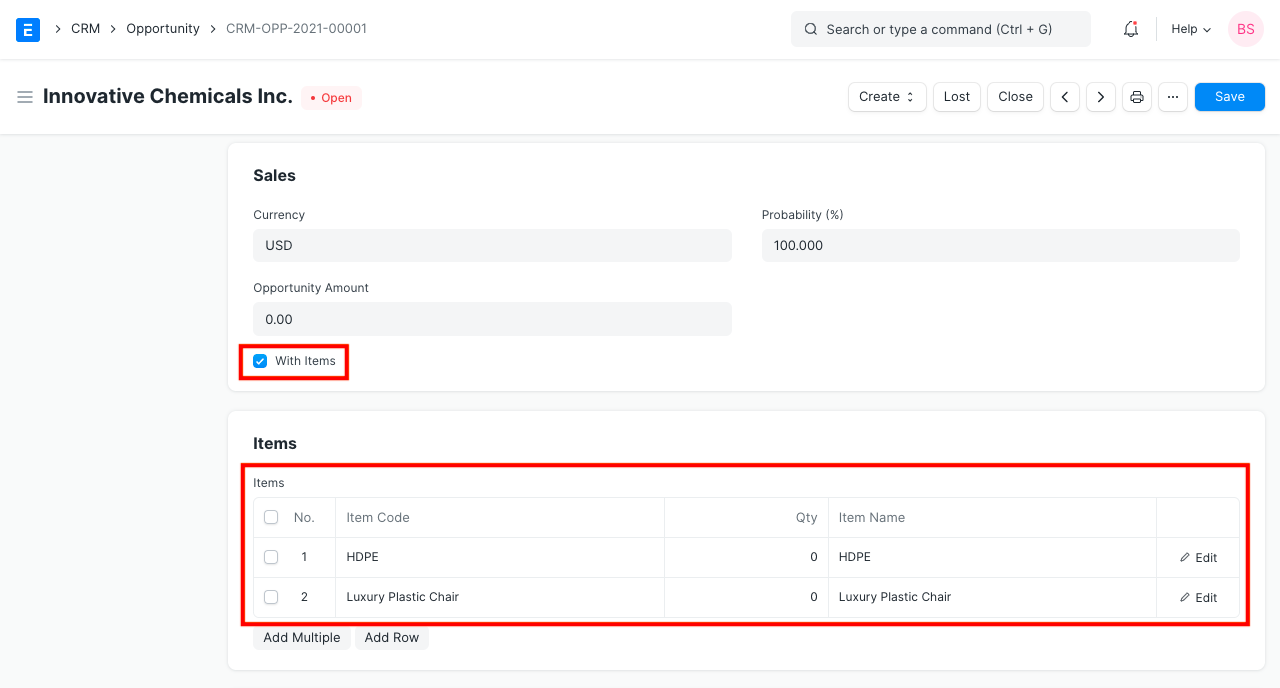
- You can add more details like Opportunity Amount, Probability (of conversion), Currency in ‘SALES’ section.
- You can capture the details of the products/services needed by clicking on ‘With Items’ checkbox and adding the item and quantity details in ‘Items’ section.
- Enter the Source of the opportunity in the SOURCE section.
2. Features #
2.1 Reminders to Follow Up on Opportunities #
It is important to reach out to opportunities from time to time and build the relationship. You can set the ‘Next Contact Date’ and ‘Next Contact By’ fields and a calendar event will be added for the user chosen in ‘Next Contact By’ field and a notification is shown on the that Date.
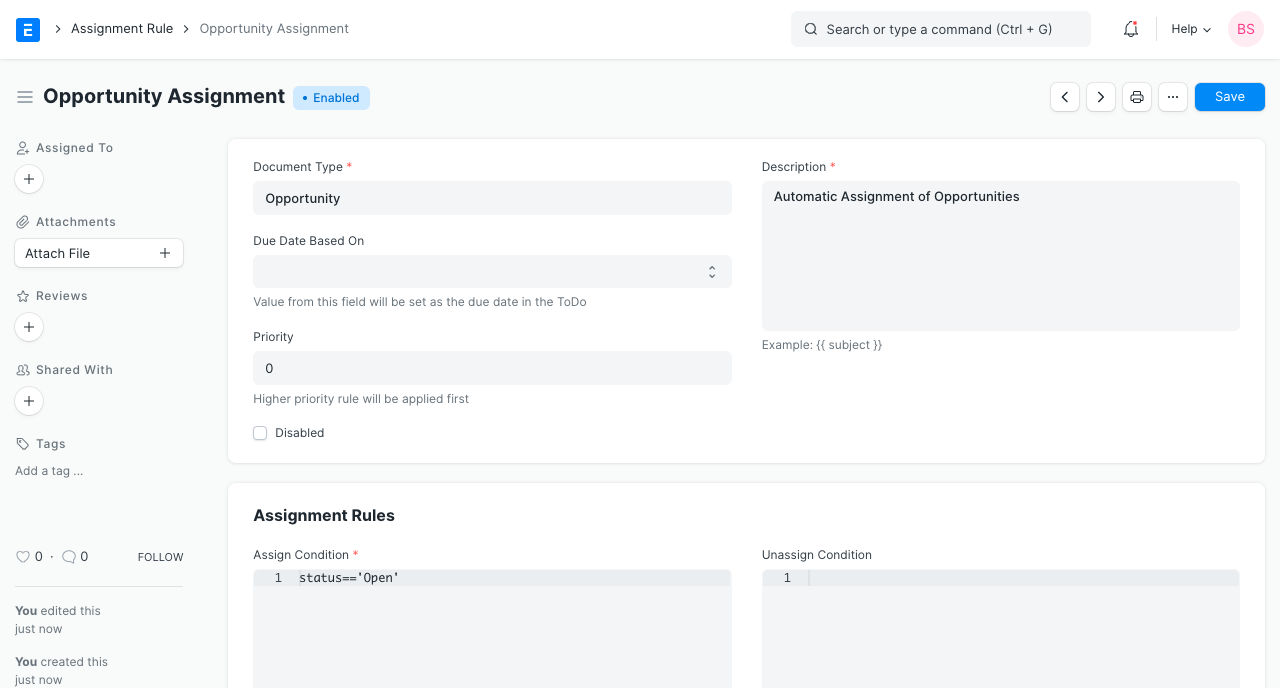
2.2 Auto-assign Opportunities to Sales Executives #
Introduced in Version 12
You can define Assignment Rules to automatically assign the opportunities to sales executives.
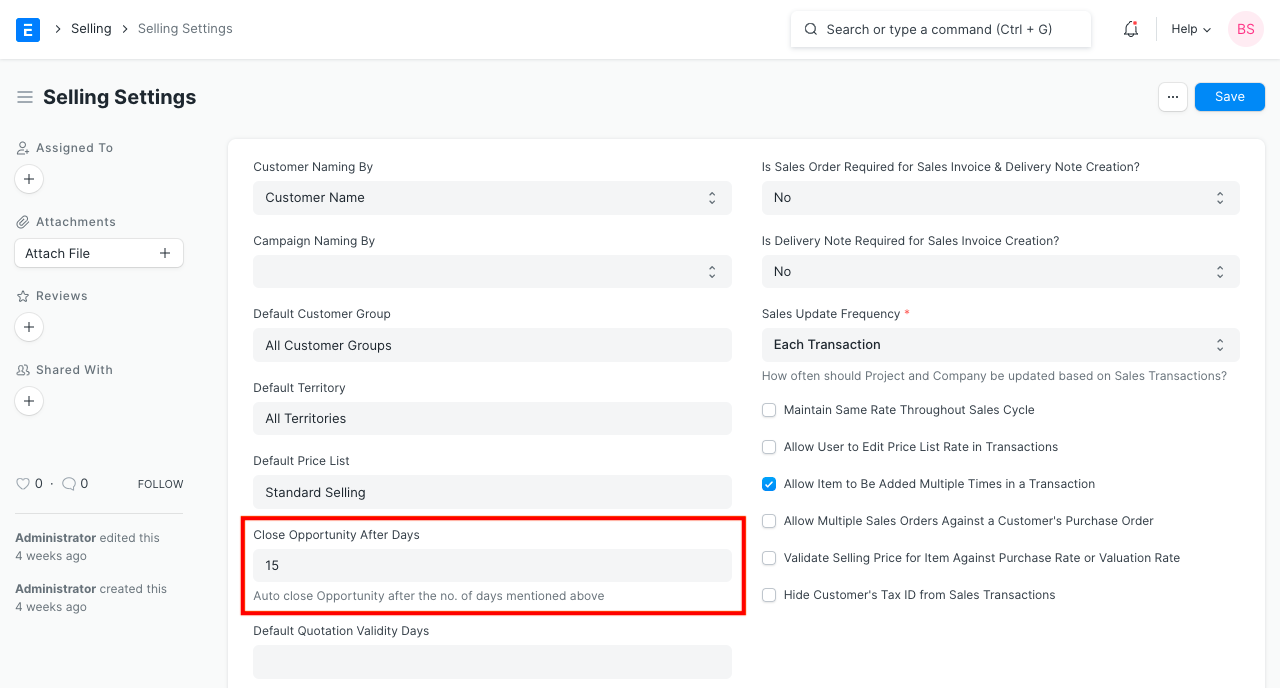
2.3 Auto-close Opportunities #
If you do not receive a response from an opportunity for a certain number of days, you may want that opportunity to be closed automatically.
You can set the number of days in Selling Settings.
2.4 Create a Quotation #
You can create a Quotation from the Make dropdown. Relevant field values will be copied over.
2.5 Create a Supplier Quotation #
You may need to get a quotation from your supplier against the customer requirement and based on that, prepare the quotation for your customer. With Emeron ERP, you can make a Supplier Quotation from the opportunity itself.
Best Practice: Leads and Opportunities are often referred as your “Sales Pipeline” this is what you need to track if you want to be able to predict how much business you are going to get in the future. Its always a good idea to be able to track what is coming in order to adjust your resources.
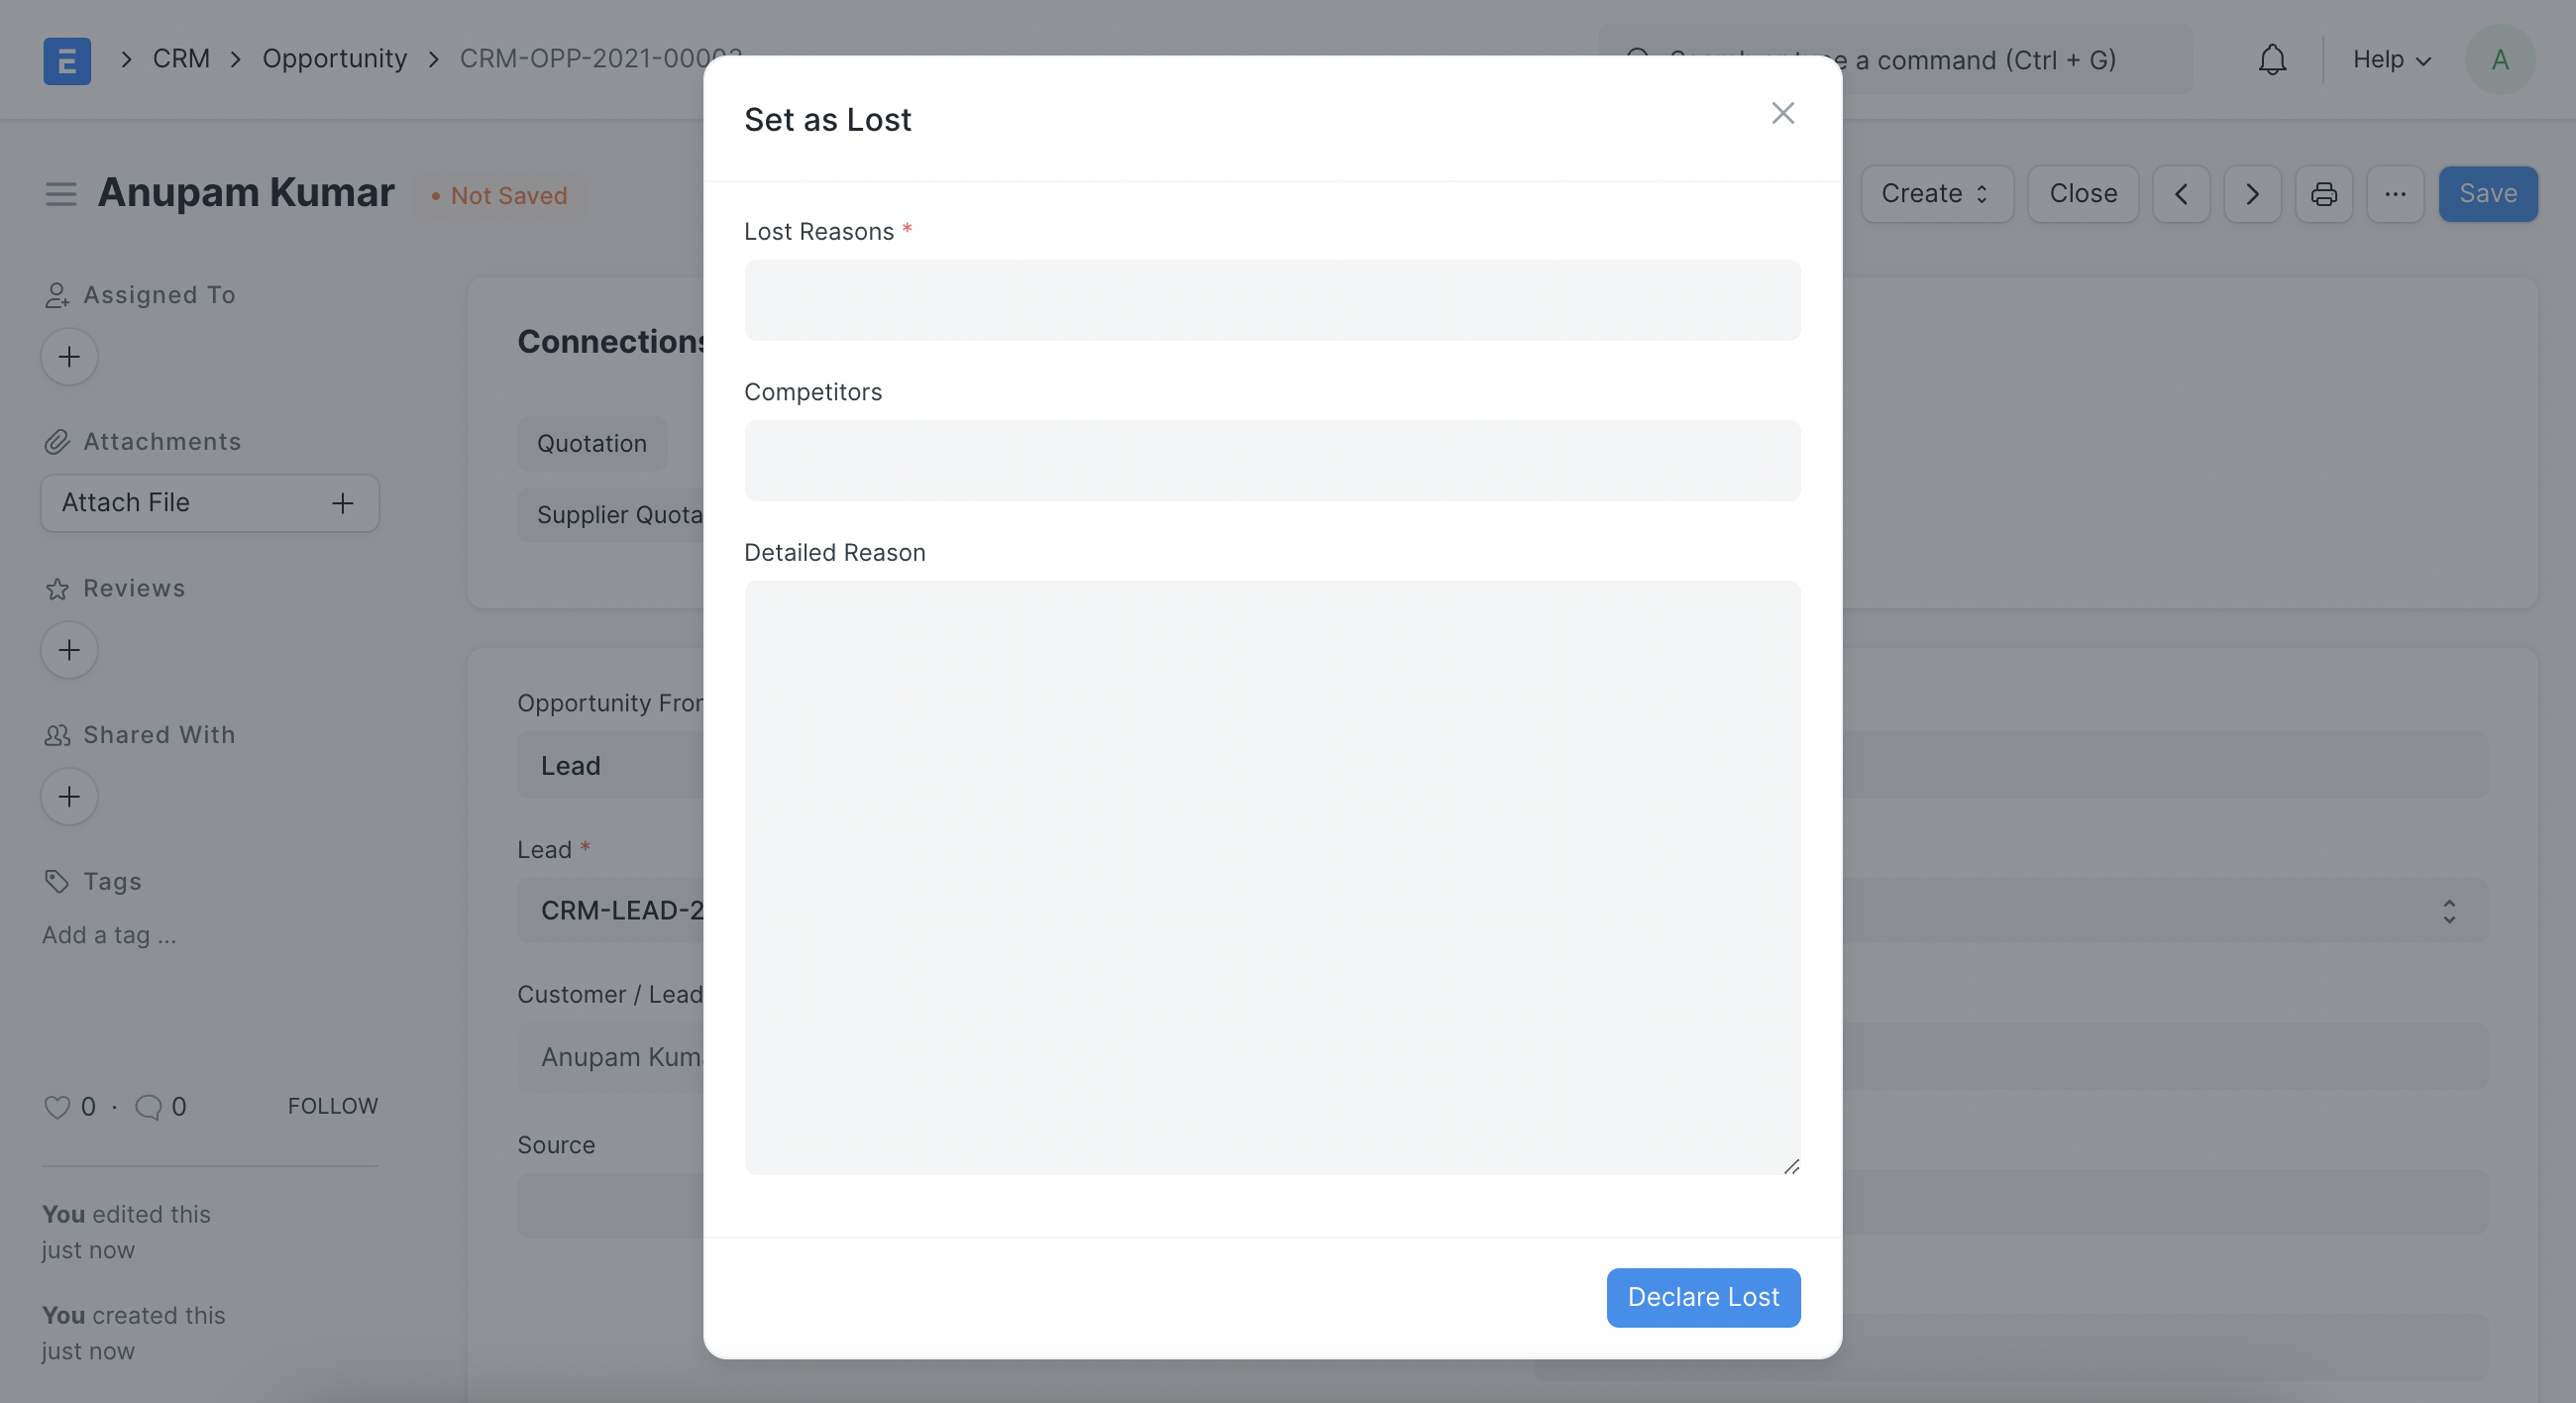
2.6 Capture the Reasons and Competitors for Lost Opportunities #
When an opportunity is lost, you can capture the reasons, competitors and detail reason for losing. This will help you to analyse the trends over a long period of time and identify the insights needed for improvements at various areas in the organisation.
2.7 Minutes to First Response #
When you send the first reply(email) to an Opportunity, it calculates Mins to First Response and is displayed in a field.
A report is generated called ‘Minutes to First Response for Opportunity’. Read CRM Reports for more details.
3. Related Topics #
- Quotation
- Customer
- Lead
- Supplier Quotation
- Difference between Lead, Contact, and Customer
Appointment #
An appointment is a prearranged meeting between a Lead and an Employee of your Company.
Appointment document type can be used to schedule and manage interaction with a Lead or an Opportunity.
To access Appointment list, go to:
Home > CRM > Sales Pipeline > Appointment
1. Prerequisites #
- Appointment Booking Settings
- Holiday List
- Employee
- Lead
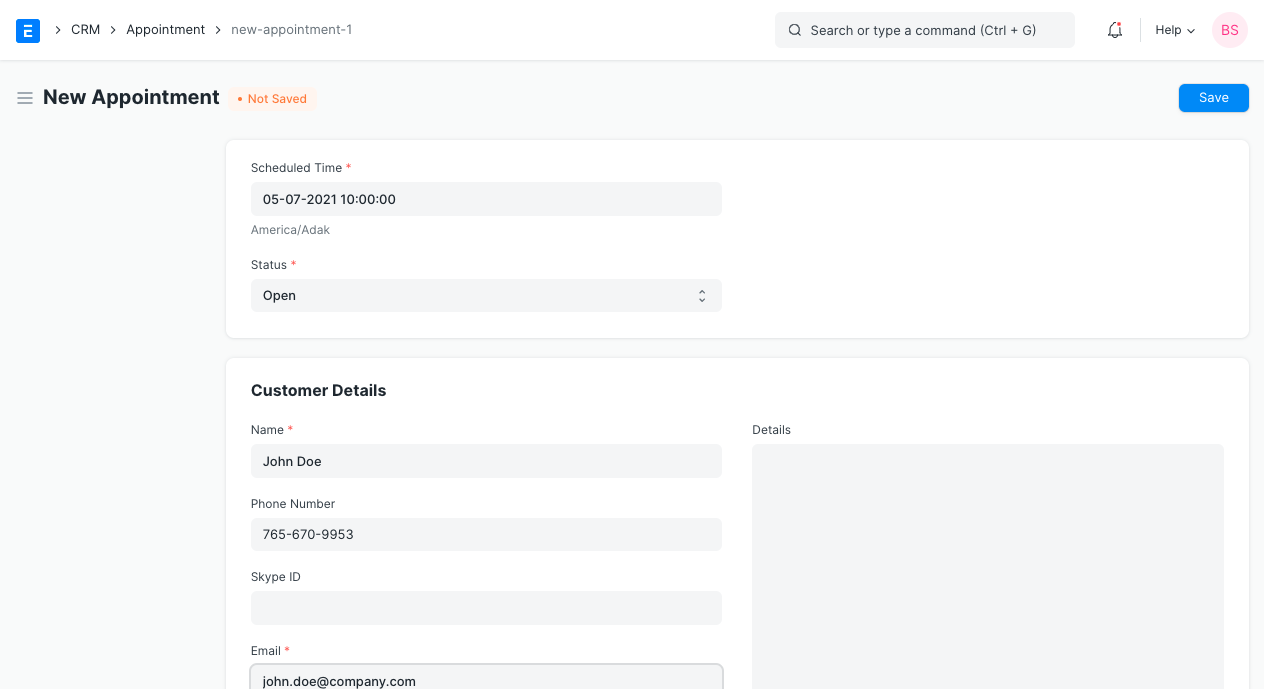
2. How to create an Appointment #
- Go to Appointment list, click on New
- Select scheduled time of the appointment
- Enter customer details
- In linked documents, if you have already created a Lead for the Customer you can set it here. Otherwise the system will automatically create a new lead with the customer details from previous step.
- Save.
2.1 Creating appointments via website #
Your Customers/Leads can create appointment using the webpage yoursitename.com/book_appointment.
First they need to set a date, time.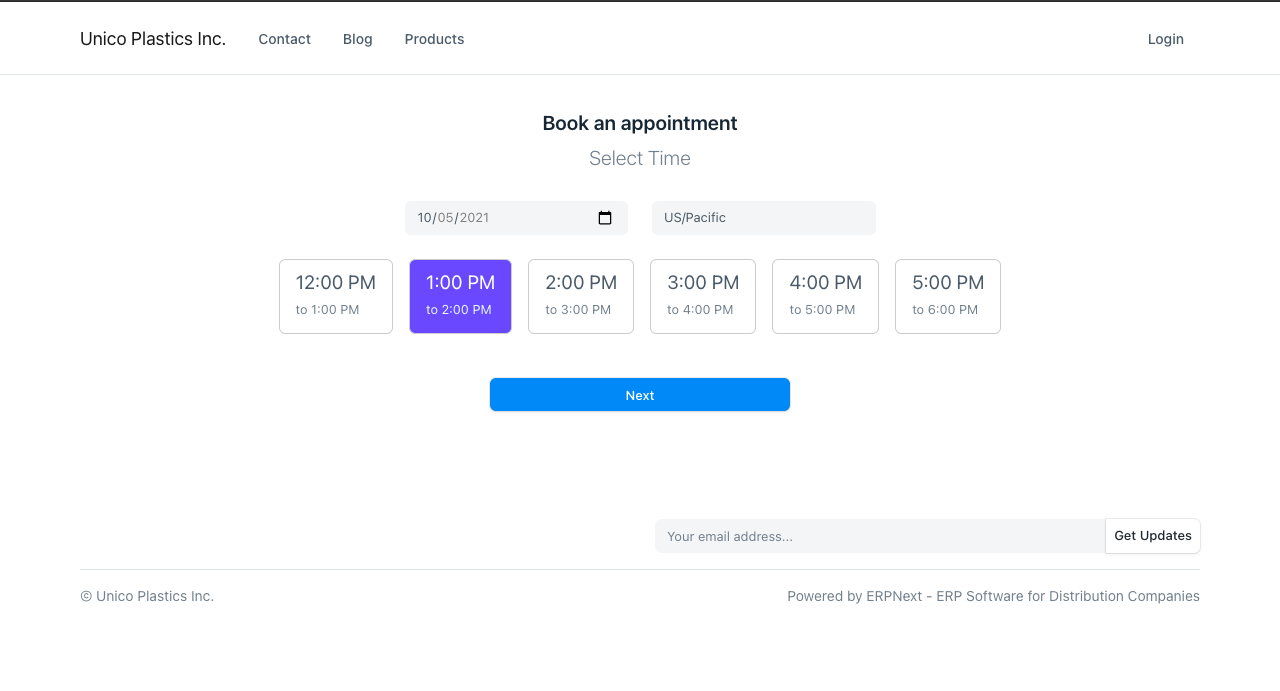
Then, add more details: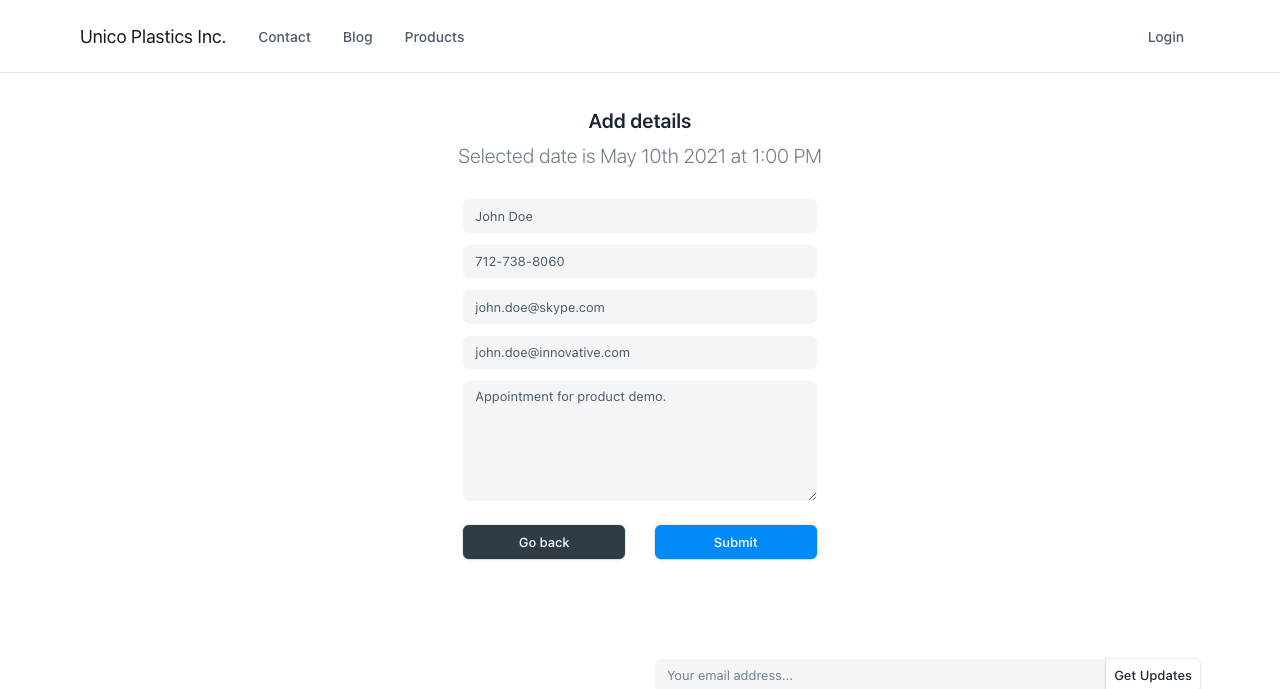
It’ll match the customer email with leads in the system and if one is found, it is linked with the document. If no lead is found, the appointment is marked as “Unverified” and an email is sent to the customer to confirm their email
3. Features #
3.1 Autoassign #
Appointments are automatically assigned to employees as per the Agents list in Appointment Booking Settings. The agent with the least number of assignments for the day of the appointment and who is free in the scheduled time is assigned to the appointment.
3.2 Email confirmation #
If there is no matching lead in your system, an email will be sent to the email address in the appointment to confirm if the email address is valid. Upon confirmation, a new Lead will also be created in the system along with the Appointment.
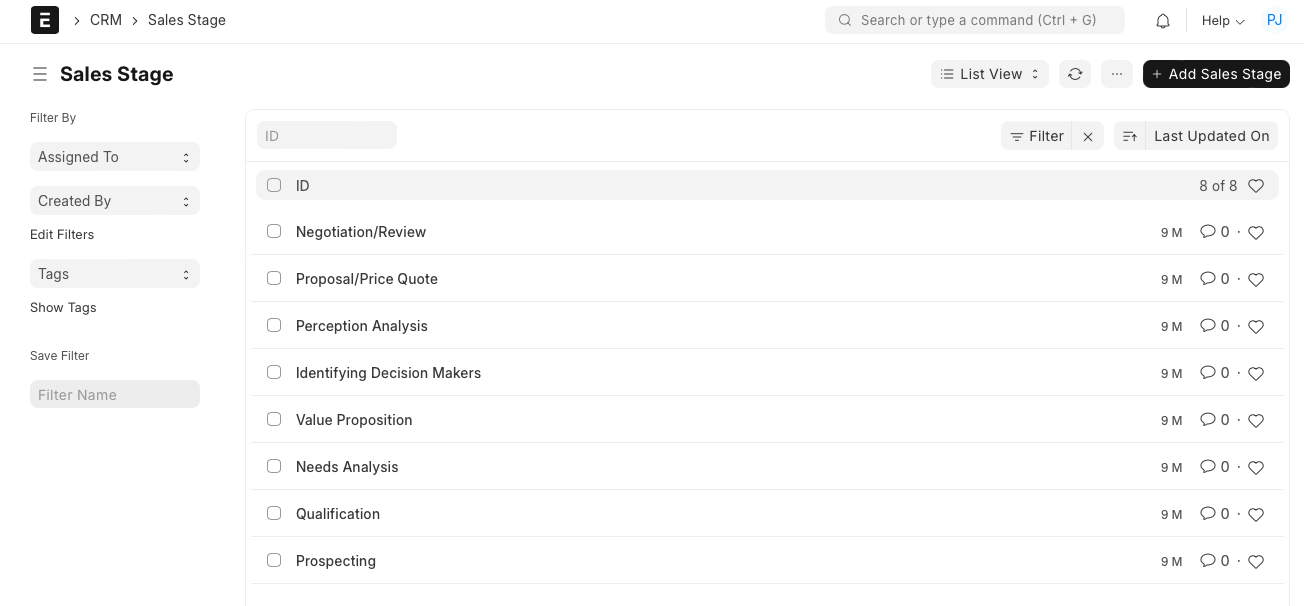
Sales Stage #
A Sales Stage indicates the level at which an opportunity is in the sales cycle.
Generally high values deals go through a number of stages before the sale is concluded. You will have to nurture high value opportunities over a period of time before you can successfully close a sale.
You can create the sales stages and in each opportunity you can select the stage it is in and update it as you nurture the opportunity. This helps you getting an overview of how many opportunities you have in each stage.
To access Sales Stage, go to:
Home > CRM > Settings > Sales Stage
- How to Create a Sales Stage
- Go to the Sales Stage and click on New.
- Enter the Stage Name.

The system allows you to maintain a list of different sales stages.
Contract #
A contract is a legally binding agreement between a Supplier and a Customer over the sale or products or services.
A contract is legally enforceable because it meets the requirements and approval of the law. An agreement typically involves the exchange of goods, services, money, or promises of any of those.
To access the Contract list, go to:
Home > Sales Pipeline > Contract
How to Create a Contract #
- Go to the Contract list and click on New.
- Choose the Customer.
- Enter the Contract Terms. A template can also be created for easily fetching the terms.
- Save.
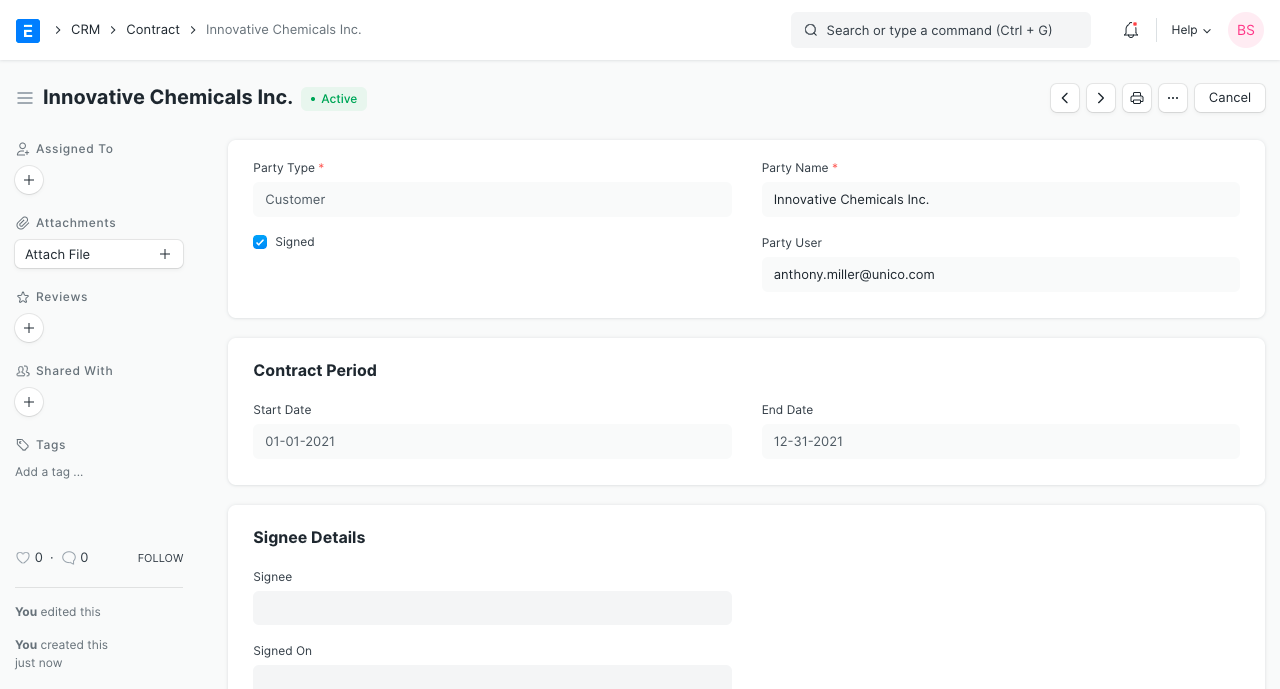
Party User: The employee from your Company who is in contact with the Customer.
1.1 Statuses #
- Unsigned: The Contract has not yet been signed by the Customer.
- Active: The Contract has been signed and is active under the Contract Period.
- Inactive: The Contract is out of the Contract Period and not valid anymore.
2. Features #
2.1 Contract Period #
The Start and End date within which the Contract is valid.
2.2 Signee Details #
This section will appear when the ‘Signed’ checkbox is ticked to indicate that the Customer has signed and accepted the Contract.
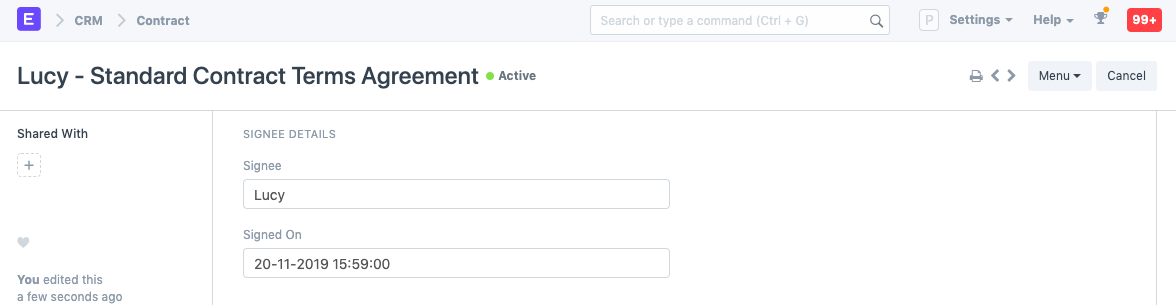
- Signee: Enter the name of the person that has signed the Contract.
- Signed On: The date on which the Contract was signed.
2.3 Contract Details #
Enter the terms of the Contract in the Contract Terms field. You can create a Contract Template and the template can be selected to fetch the Contract Terms.
2.4 Fulfilment Details #
If the Contract requires some fulfilment from the Supplier’s (your) end, their details can be recorded in the Fulfilment Terms table.
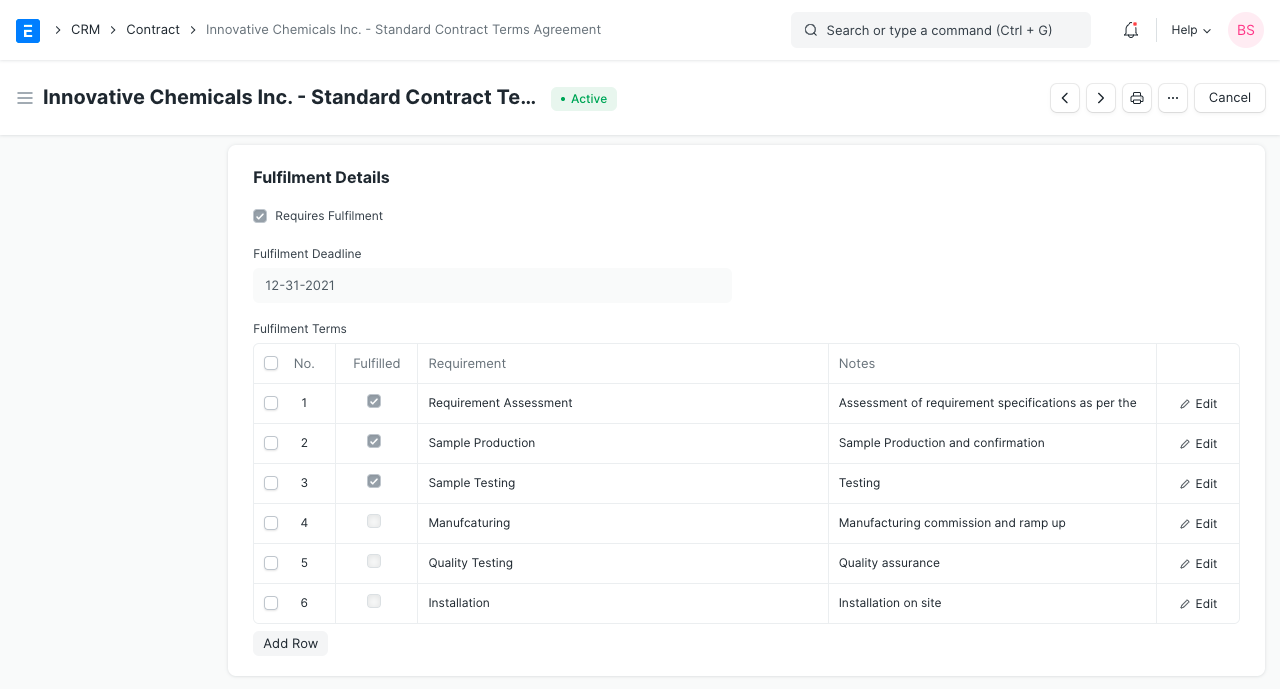
- Requirement: Enter a requirement that needs to be fulfiled. For example, ‘installation’.
- Notes: Any notes about the requirement can be entered here.
2.5 Contract Template #
A contract template is a standardized outline of a contract without the specifics involved. You can create a new template by going to:
Home > CRM > Contract Template
You can create templates by using Jinja. Eg:
The parties enter into this contract on {{ start_date }}.
When you create a new contract using this template, the {{ start_date }} is replaced by the date entered into the field of the same name.
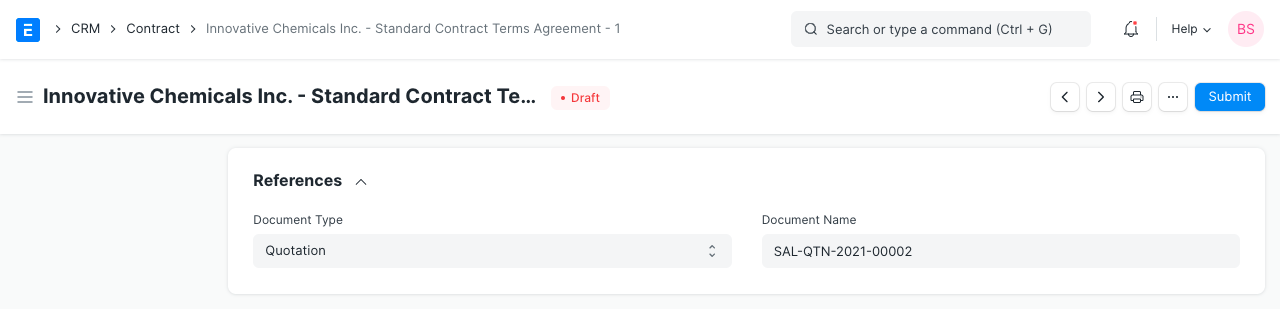
2.6 References #
If the Contract can be linked to a transaction in Emeron ERP. Select the transaction type and the specific transaction. The documents that can be linked are:
- Quotation
- Project
- Sales Order
- Purchase Order
- Sales Invoice
- Purchase Invoice
Email Campaign #
An Email Campaign is a coordinated set of emails sent to leads or contacts according to a particular schedule.
Email Campaigns are still one of the most effective ways to reach your Customers, Contacts or Leads and keep them engaged. For example, you could set up Email Campaigns for introducing your product to the customers, with every email revealing an interesting feature of your product.
To create an Email Campaign, go to:
Home > CRM > Campaign > Email Campaign
#1. Prerequisites #
Before creating and using Email Campaign, these need to be created first:
- Campaign
- Lead or Contact or Email Group
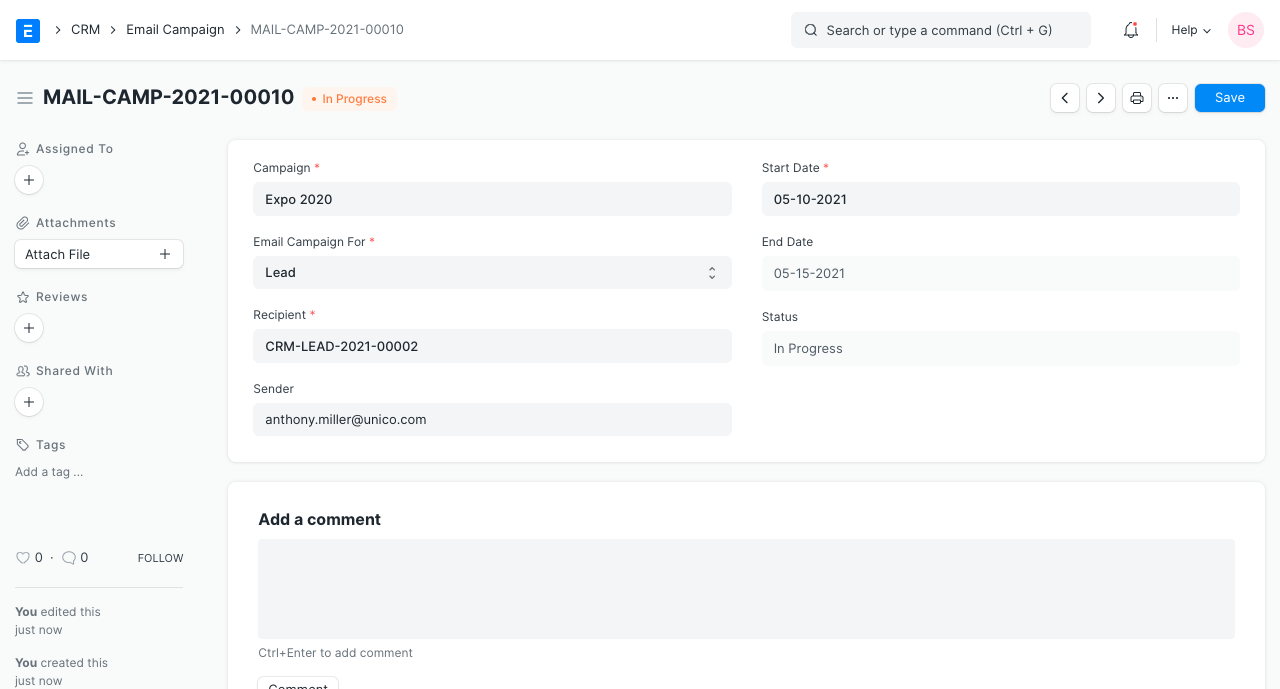
#2. How to Create an Email Campaign #
- Go to the Email Campaign list, click on New.
- Select the Campaign for which you want to set up an Email Campaign.
- Set the ‘Start Date’ for the Email Campaign.
- In ‘Email Campaign For’, select whether you want to set up Email Campaign for a Lead or a Contact or for an Email Group to send to multiple email contacts.
- In ‘Recipient’, select the respective Lead or Contact or Email Group for whom you want to start the Email Campaign.
- In ‘Sender’, select the user of the system who should be the sender of the emails.
- Save
The above Email Campaign is for the following Campaign:
Note: The Send After (days) field in Campaign specifies the day on which email is to be sent relative to the Start Date of Email Campaign. Notice the ‘End Date’ in the above Email Campaign. It is ’26-07-2019′, which is 4 days after the ‘Start Date’, ’22-07-2029′, as the Campaign Schedule ends on day 4.
2.1 Create multiple Email Campaigns for a Campaign #
You can also create new Email Campaigns for different Leads or Contacts for the same Campaign though the Campaign Dashboard.
- Go to the Campaign for which you want to create Email Campaigns.
- Click on + in front of Email Campaigns to create a new Email Campaign for the Campaign.
3. Features #
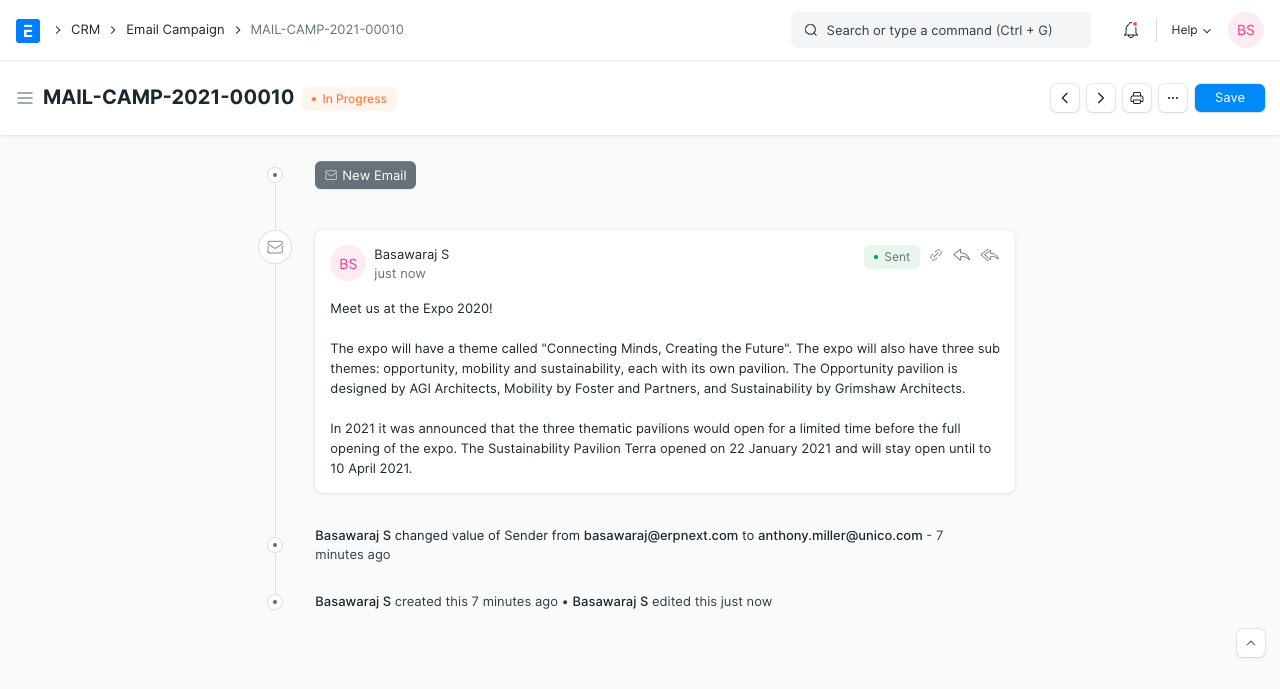
3.1 Linked Communication #
When emails are sent to the respective leads or contacts, Communication is linked to the Email Campaign document. You can view all the emails sent in your document.
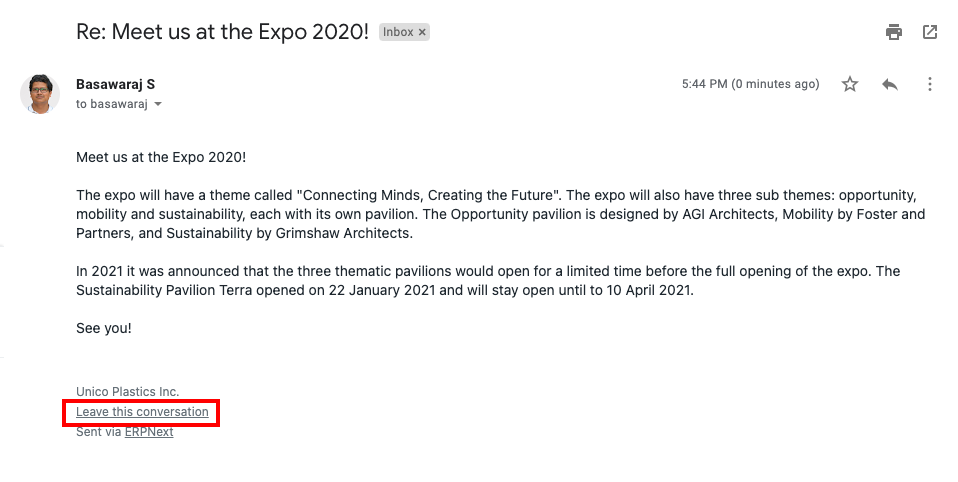
3.2 Unsubscribe from Email Campaign #
If a lead or contact does not want to continue getting emails regarding the campaign, he or she can unsubscribe from the Email Campaign via the unsubscribe link sent with the email.
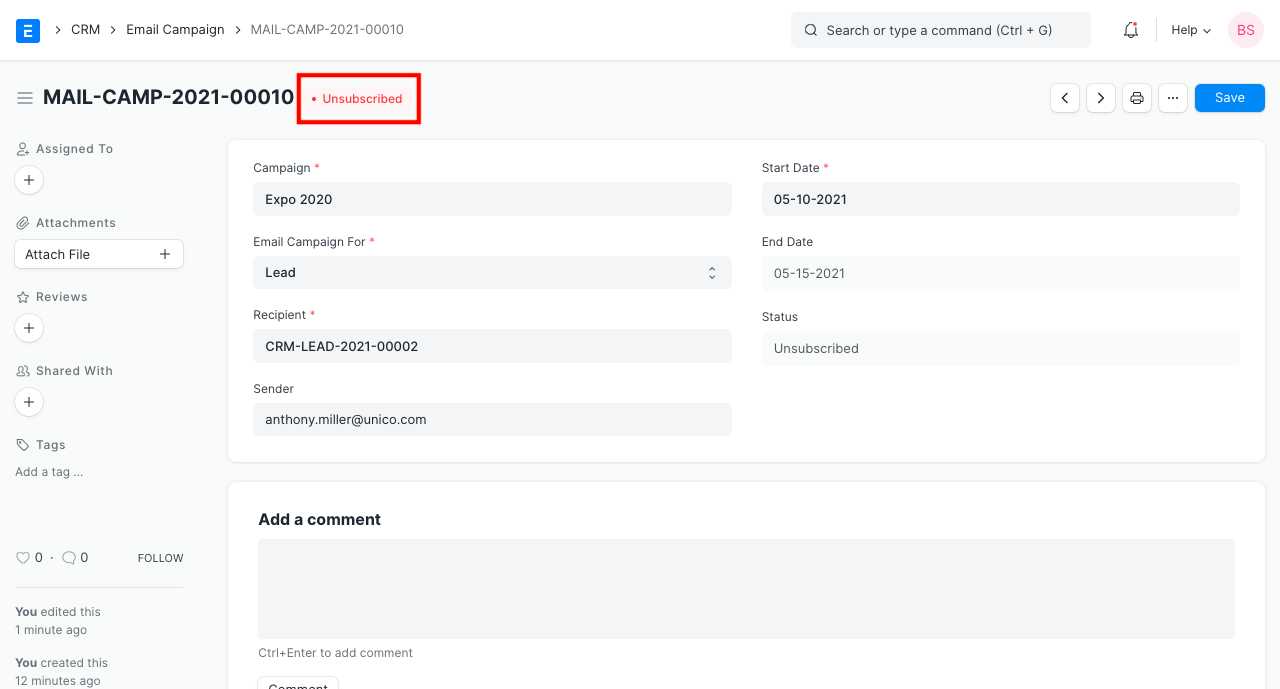
When the lead or contact unsubscribes, the status of the Email Campaign document changes to ‘Unsubscribed’.
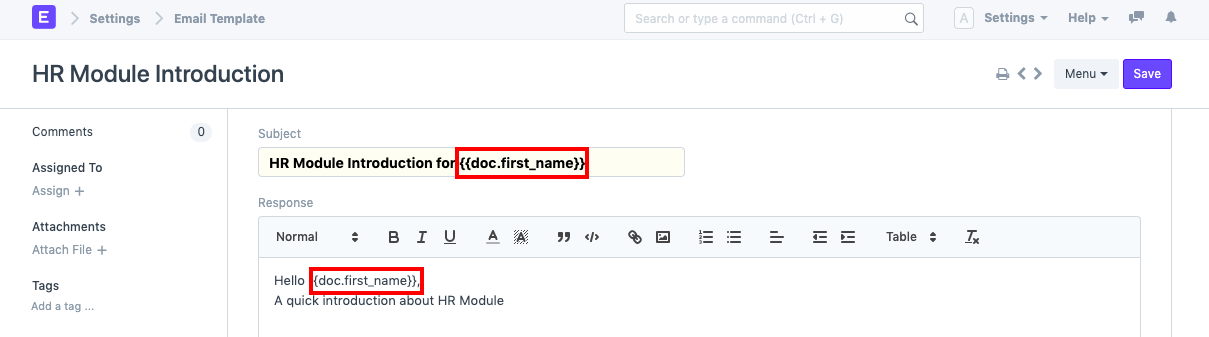
3.3 Use Lead or Contact fields in Email Template #
The Email Template has the context of the document you have specified in the ‘Email Campaign For’ field. If you want to display the fields from your Lead or Contact document in your Email Template you will have to use doc.fieldname for the same. For example, if ‘Email Campaign For’ is ‘Contact’, you can mention the ‘first name’ of your Contact as doc.first_name in the Email Template as shown below:
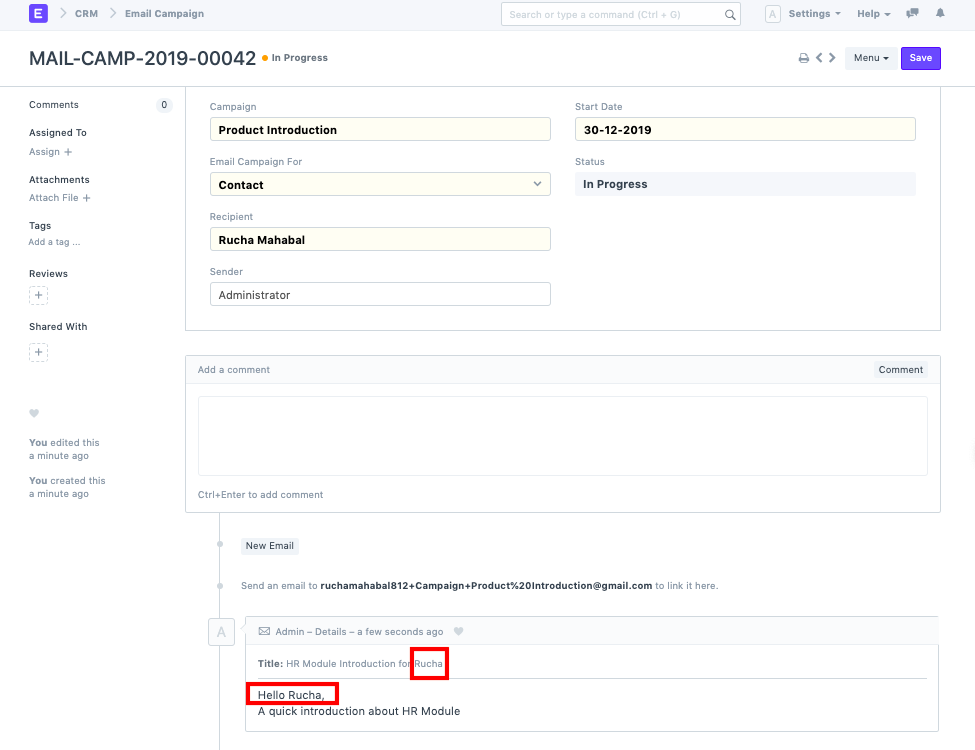
Then the emails sent would look like this:
3.4 Status indication #
Status indicates the state of the Email Campaign, the various Statuses are:
- Scheduled: When the Email Campaign has not yet started but scheduled on a future ‘Start Date’.
- In Progress: The campaign would be marked as ‘In Progress’ between ‘Start Date’ and ‘End Date’ of the campaign.
- Completed: After the ‘End Date’ of the campaign, the status will be changed to ‘Completed’.
- Unsubscribed: When the Lead or Contact unsubscribes from the Campaign.

Appointment Booking Settings #
You can find all settings related to booking appointments in Appointment Booking Settings.

1. Enable Appointment scheduling #
This checkbox will enable appointment scheduling and also enable the /book_appointment Route for website users (your customers). Your customers will see a portal view. To know more, visit the Appointment Page
2. Agent Details #
In this section, you can add details about agents, such as their working hours and holidays.
2.1 Availability of Slots #
Here you can set the timing in which your agents are available to attend an appointment. This is set per day of the week. Each row represents a continuous block of time, you can have multiple entries for each day of the week.
For example if your agents work Monday to Friday, 9am to 5pm but with a lunch break at 1.30 for half and hour. You will need to create two entries for each day. One from 9am to 1.30pm and another from 2pm to 5pm.
2.2 Agents #
This is the list of agents which will be autoassigned to appointments. The number of appointments which can exist in one timeslot also depends upon the number employees in this list.
2.3 Holiday list #
You can link a (holiday list)[https://erpnext.com/docs/v13/user/manual/en/human-resources/holiday-list] here to apply to the appointment schedule. If the day is a holiday, scheduling an appointment on that day won’t be allowed.
3. Appointment Details #
This section contains details about the appointment themselves.
3.1 Appointment Duration in minutes #
The duration of appointment in minutes. This is used to calculate appointment timeslots for the web portal. Changing this does not affect the appointments created before the change.
3.2 Notify Via Email #
Enabling this checkbox will send an email to the participants of the appointments i.e. your employee and the customer on the day of the appointment. Changing this checkbox does not affect the appointments created before the change.
3.3 Number of days appointment can be books in advance #
This is the number of days the appointment can be booked in advance. If the Holiday List provided above ends before the date calculated using this number, appointment scheduling will be stopped at the end of holiday list end.
4. Success settings #
4.1 Success Redirect URL #
This is the URL where the user will be redirected on creation of successful appointment creation via Web Portal. This redirect will not occur when creating appointments from within Desk UI. Leave blank for home. This is relative to site URL, for example “about” will redirect to “https://yoursitename.com/about”
Social Media Settings #
Social media settings in Emeron ERP play a crucial role in modern business management.
These settings enable businesses to integrate their ERP system with various social media platforms, such as Twitter, LinkedIn. By connecting Emeron ERP with social media, businesses can streamline their marketing efforts, enhance customer engagement, and gather valuable insights into consumer behavioR
CRM Reports #
CRM reports in Emeron ERP offer valuable insights into lead management. They help businesses track key metrics, evaluate the success of various campaigns, and understand customer behaviour.
By analyzing these reports, companies can make informed decisions, streamline their sales processes, and enhance customer relationships, leading to improved overall efficiency and growth.
Home > CRM > Reports
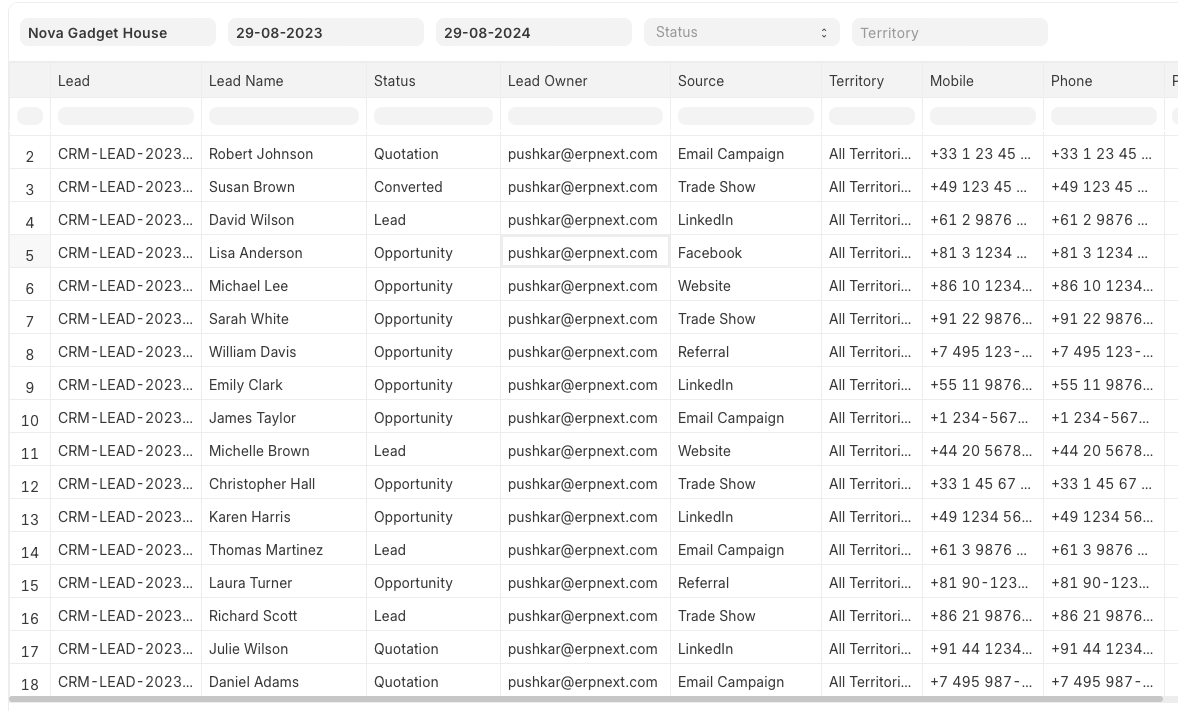
1. Lead Details #
It typically provides an overview of the leads you are managing, including key details and metrics related to lead status, source, conversion, and more.
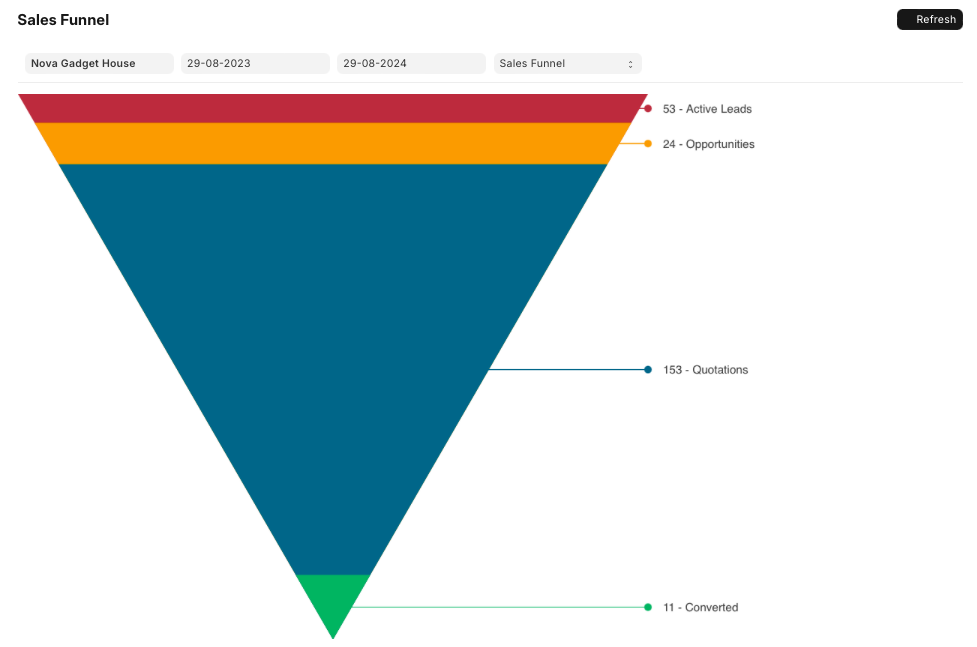
2. Sales Funnel #
The Sales Funnel Report provides a visual and analytical view of your sales pipeline, helping you understand the status and progression of leads and opportunities through various stages of your sales process.
For more details check Sales Funnel.
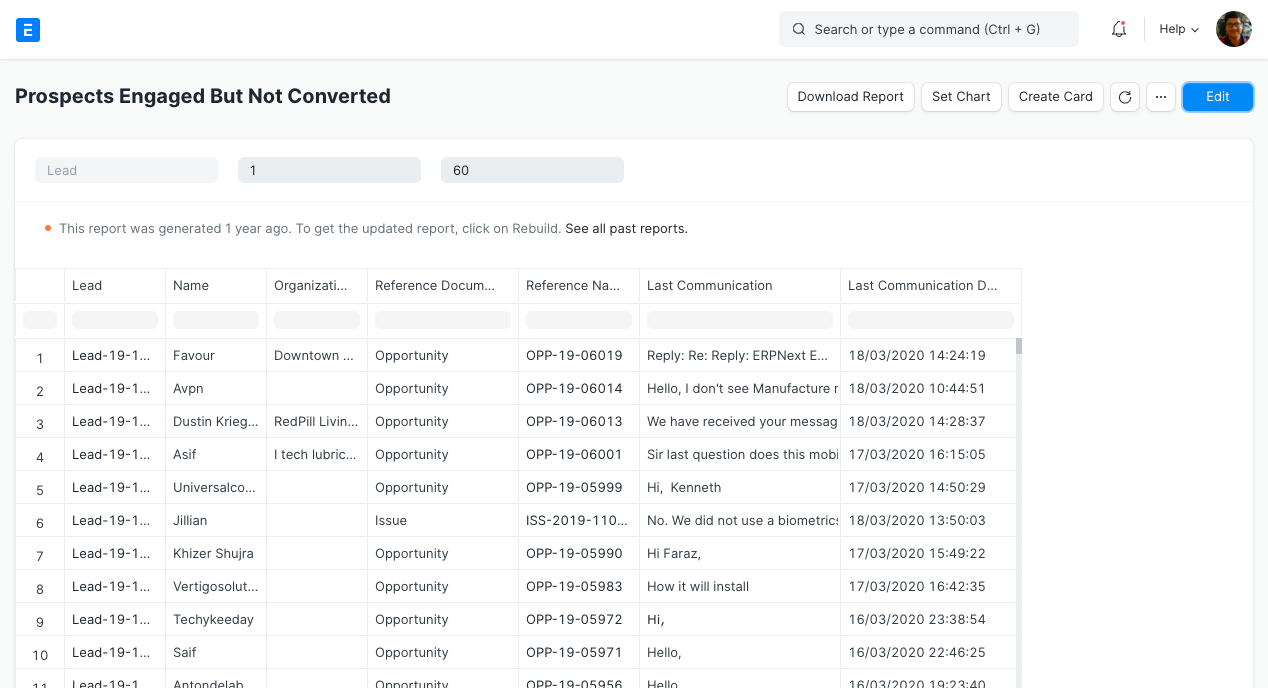
3. Prospects Engaged But Not Converted #
It helps you identify and analyze leads or opportunities that were engaged but did not result in a conversion.
4. Minutes to First Response for Opportunity #
In this internet era, we all expect a quicker response time to any of our queries. This report gives you the details about time taken by sales executives for response to an opportunity. Lesser the average time for first response the better.
You can input the date range for which you would like to analyse the minutes to first response. The line graph is shown on the top and date wise details at the bottom.
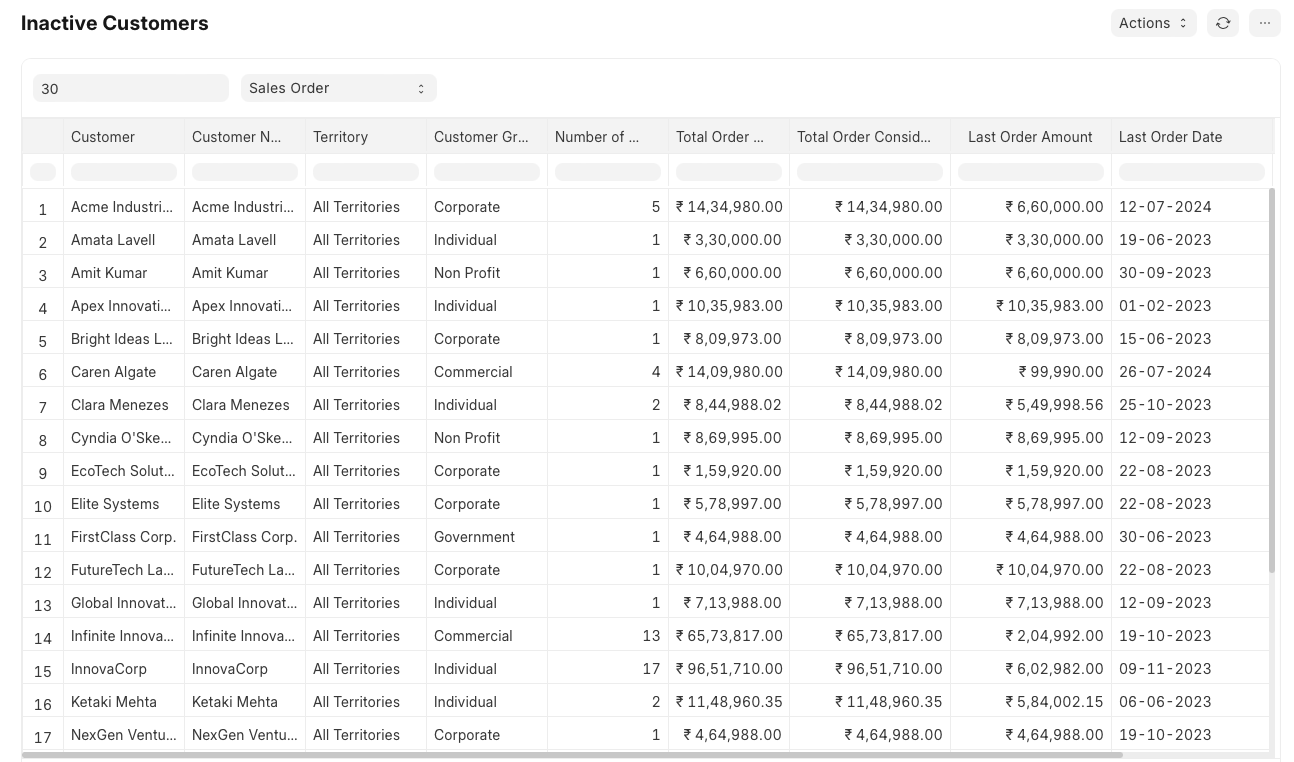
5. Inactive Customers #
This report shows the list of customers who have not purchased since specific number of days. You can mention the number of days in ‘Days Since Last Order’ filter. Also you can mention if Sales Order or Sales Invoice is to be considered in DocType filter.
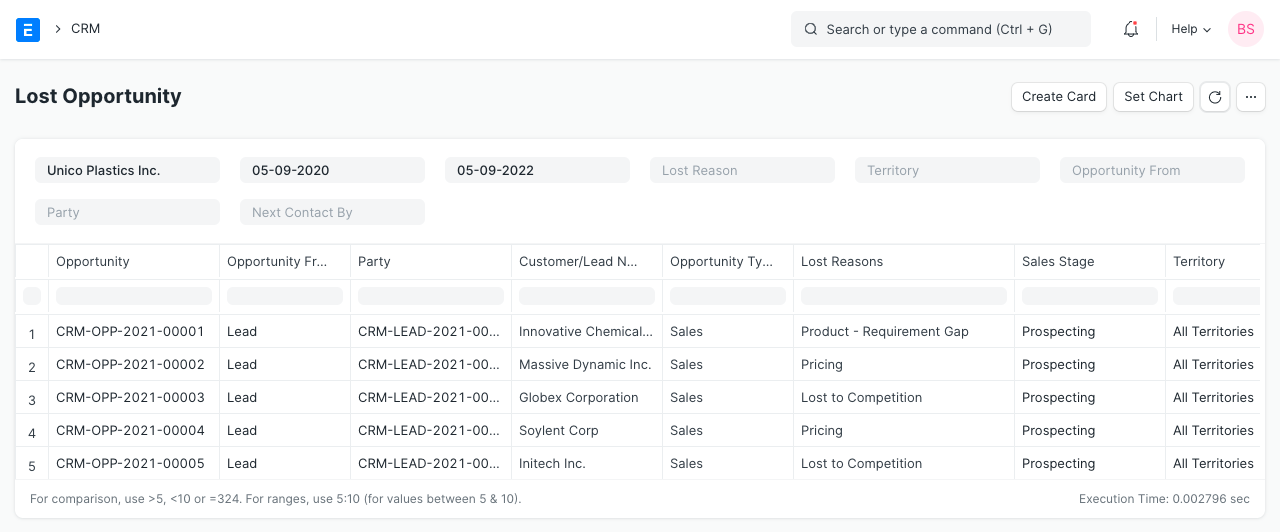
7. Lost Opportunity #
This report provides Lost Opportunity details like opportunity from, party, customer name, lost reasons, sales stage, territory, and other details.
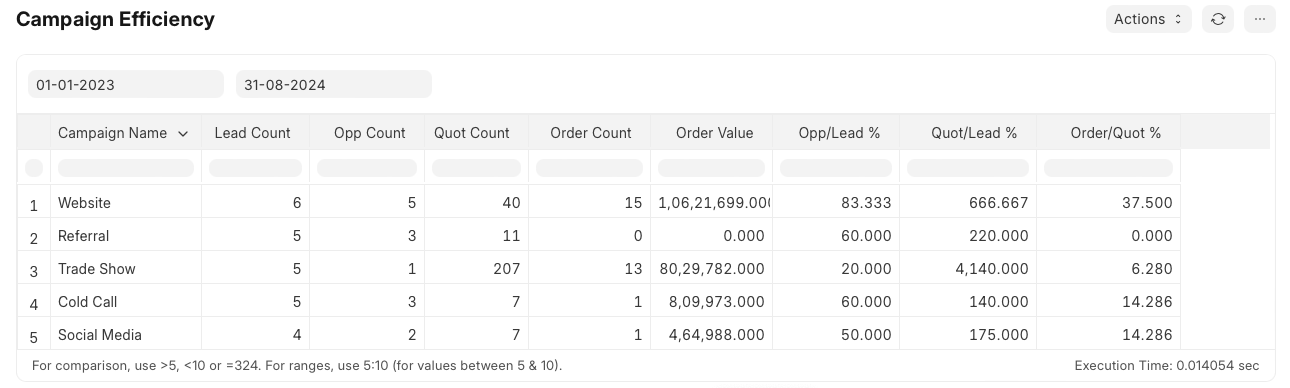
8. Campaign Efficiency #
This report evaluates the effectiveness of your marketing campaigns by analyzing various performance metrics. This report helps you understand how well your campaigns are performing, the return on investment (ROI), and areas where improvements can be made.