

Employee Lifecycle Management relates to the various stages an Employee goes through during the employment with an organization. It is important for most enterprises’ HR departments to keep records of these changes that the employees go through across the company. Emeron HR simplifies these HR activities, read the following sections to understand how.
Employee Onboarding #
In the process of hiring an Employee, there are set of standard activities which need to be executed. This feature helps you to maintain the masters of these activities, and create a set of tasks at the time of each Employee hiring.
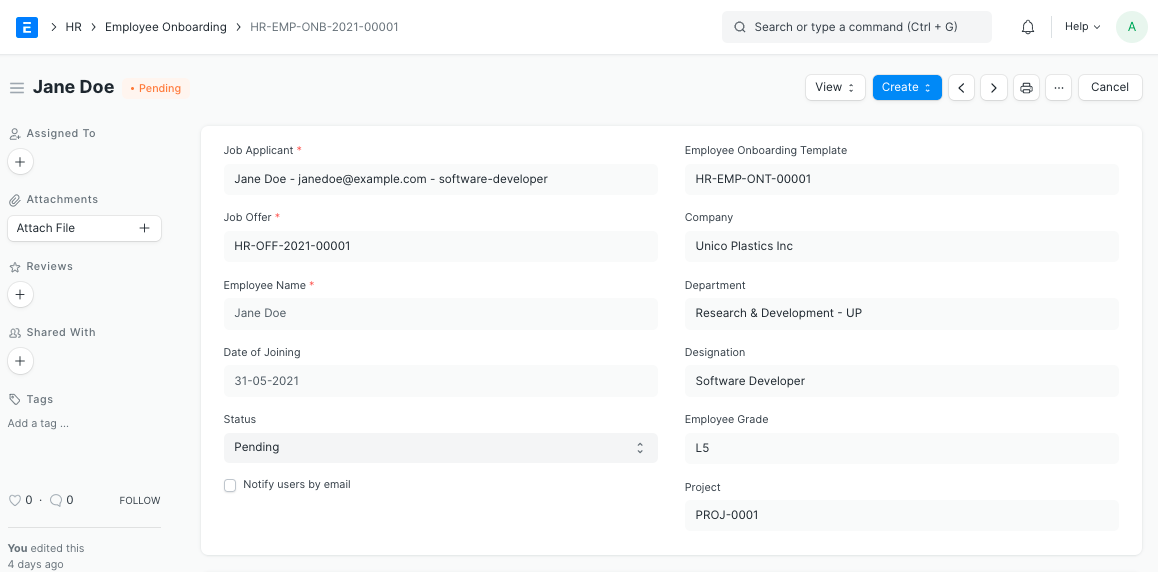
Employee Onboarding is created for a Job Application, who is approved for the hiring.
Use Case: Let’s assume that following are the activities which need to be performed as soon as a job applicant is approved to be hired.
- Perform a legal and professional background check
- Create an Employee master
- Create an Email Account
- Create an identity card
- Allocate leaves
In Emeron HR, these standard activities can be tracked in the Employee Onboarding Template. To access Employee Onboarding, go to:
Human Resources > Employee Lifecycle > Employee Onboarding
#1. Prerequisites #
Before creating an Employee Onboarding, it is advisable that you create the following documents:
- Job Applicant
- Employee
- Department
- Designation
- Employee Grade
2. How to create an Employee Onboarding #
- Go to: Employee Onboarding > New.
- Select the Job Applicant. once the Job Applicant is selected, the corresponding Employee will automatically get fetched.
- Select the Employee Onboarding Template. Based on the template selected, information such as Department, Designation and Employee grade will be automatically fetched (if already mentioned in the Onboarding Template).
- Enter Date of Joining.
- Save and Submit.
Note 1: If an Employee Onboarding Template isn’t created, you can directly fill the onboarding information in the Employee Onboarding doctype itself.
Note 2: The ‘Status’ of the Employee Onboarding will change to Completed once all the associated Activities are complete.
3. Features #
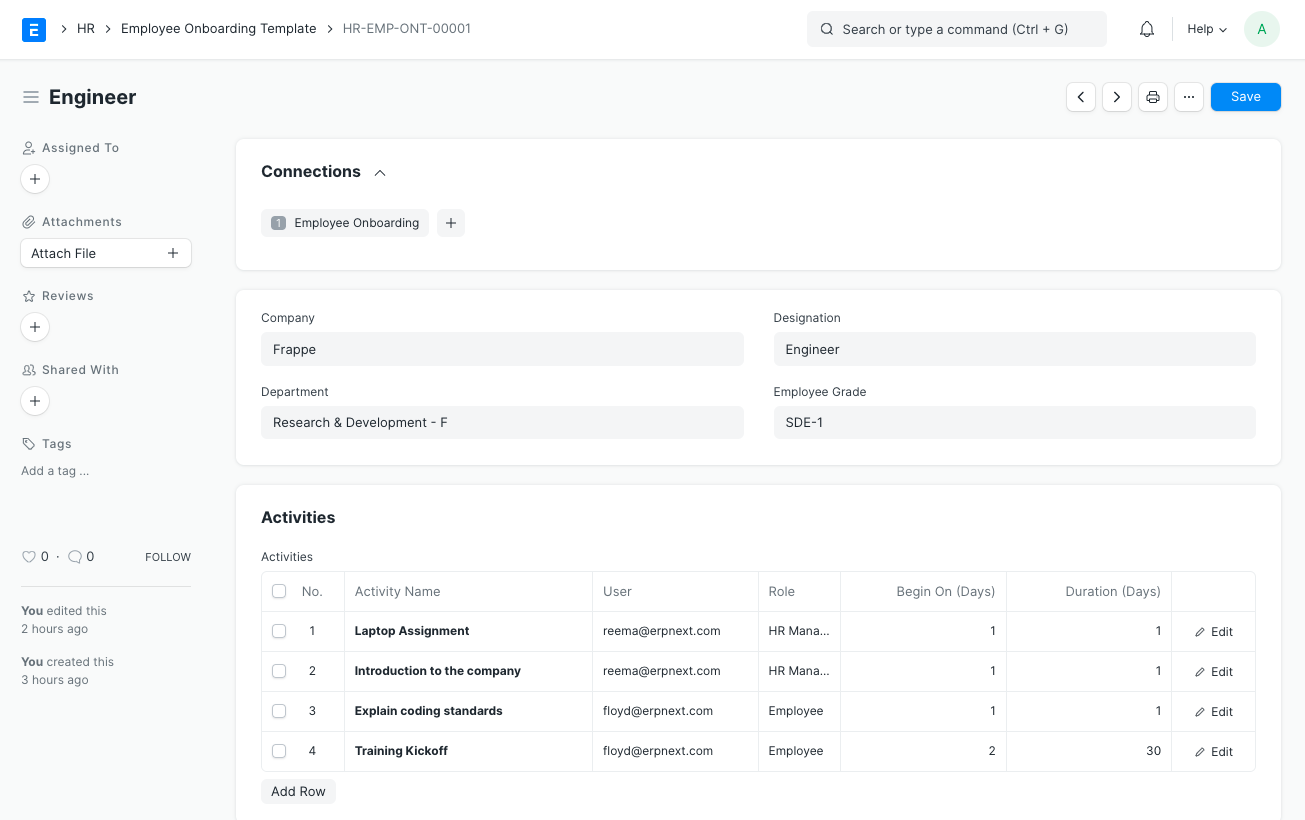
3.1 Employee Onboarding Template #
The Employee Onboarding Template is a blueprint which contains a predefined list of Activities for Employee Onboarding. An Employee Onboarding Template can be created for a particular Department, Designation and Employee Grade.
To create a new Employee Onboarding Template:
- Go to: Human Resources > Employee Lifecycle > Employee Onboarding Template > New.
- Enter the Department, Designation and Employee Grade (optional).
- Mention the Activities for onboarding. For each Activity, you can also mention the User or Role, or one of it, to whom this Activity will be assigned.
- You can also schedule the Onboarding Activities by specifying the Begin On (Days) i.e. when the activity has to start and the Duration (in Days) for the same.
3.2 Tasks and Assignments #
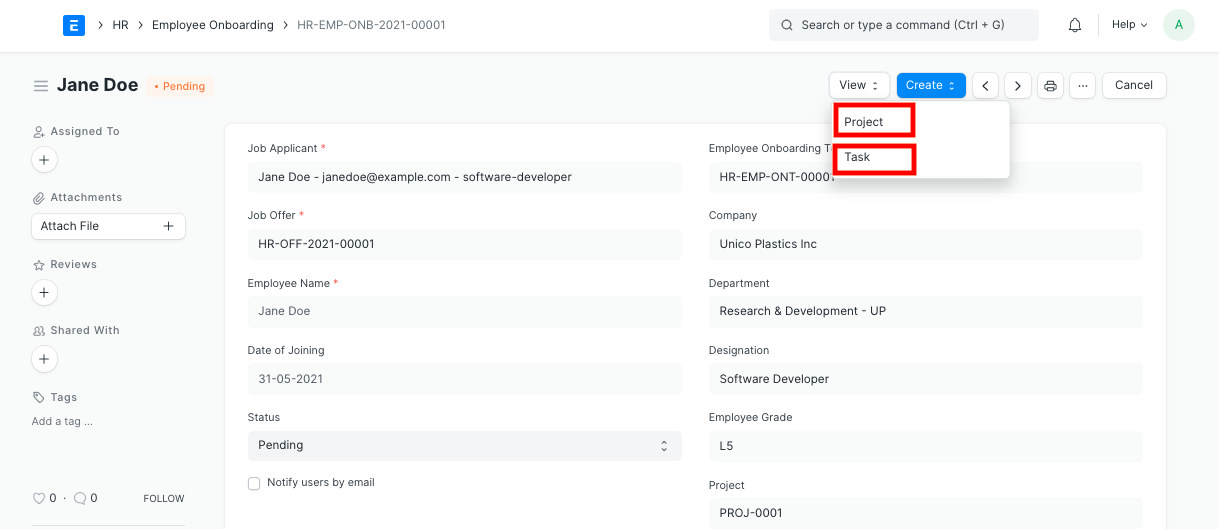
On submission of the Employee Onboarding, a Project will be created. Within the Project, Tasks will also be created for each Activity. If you have set the date and duration against activities, tasks will be created with appropriate Start and End Date excluding holidays.
You can view the created Projects and Tasks as shown below:
Additionally, each Activity can be assigned weights based on its importance.

Based on the progress on the Tasks, progress can be updated in the Employee Onboarding process.
3.3 Employee Creation #
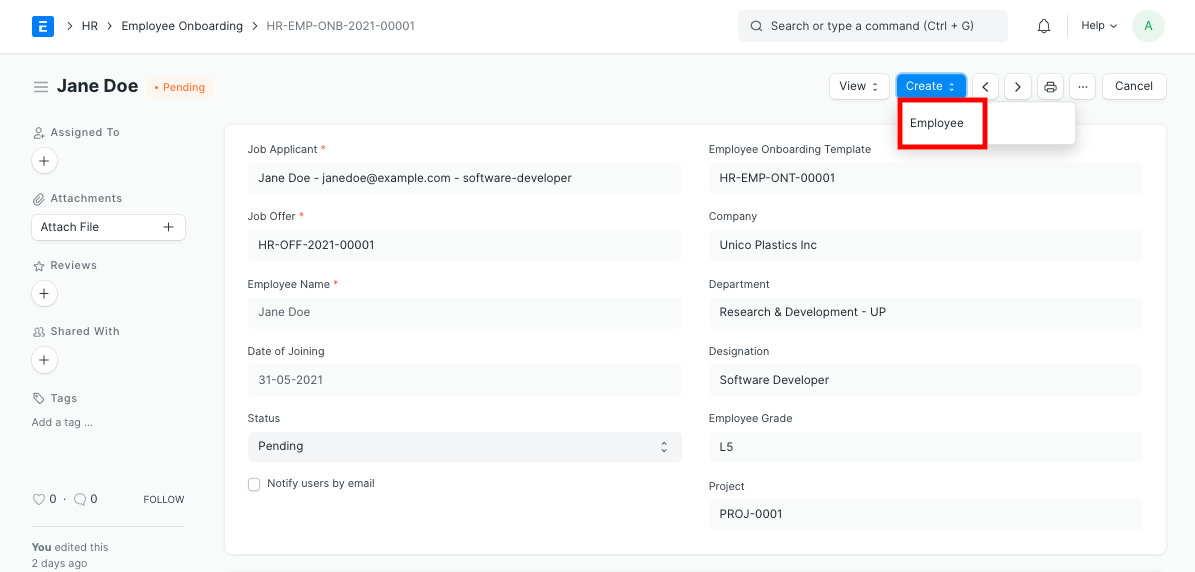
You can directly create an Employee through the Employee Onboarding doctype (if not already created) once all the mandatory onboarding tasks are complete.
Employee Promotion #
Promotion or career advancement is a process through which an Employee of a company is given a higher share of duties, a higher pay-scale or both.
In Emeron HR, you can manage Employee Promotion and its various associated activities using this document.
To access Employee Promotion, go to:
Human Resources > Employee Lifecycle > Employee Promotion
1. Prerequisites #
Before creating an Employee Promotion, it is advisable that you create the following documents:
- Employee
- Department
2. How to create an Employee Promotion #
- Go to: Employee Promotion > New.
- Select the Employee.
- Enter the Promotion Date.
- In the Employee Promotion Detail table, select the Property and set the Current and New value.
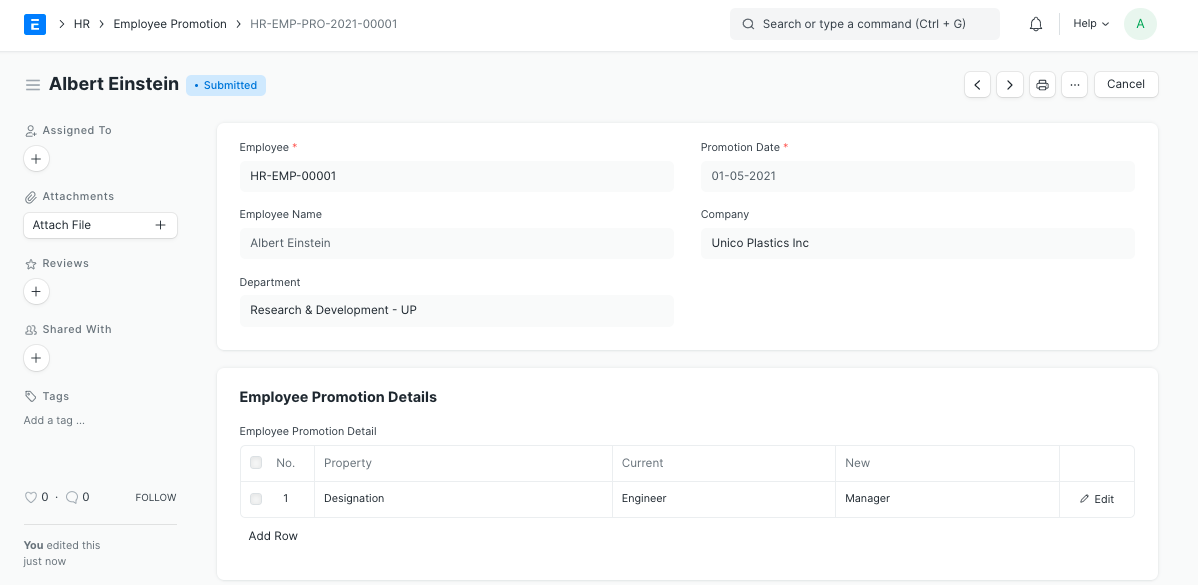
Note: Promotion document can be submitted on or after Promotion Date. Once submitted all the changes added to Promotion Details table will be applied to the Employee. Emeron HR also keeps a record of all promotions of the Employee in the Employment History table in Employee document.
Employee Separation #
Employee Separation is a situation when the service agreement of an Employee with his/her organization comes to an end and the Employee leaves the organization.
Employee Separation is created for an Employee who has resigned or terminated from the organization.
Use Case: Let’s assume that following are the activities which need to be performed as soon as an Employee needs to be separated from the organization.
- Collect laptop
- Clear dues
- Delete Employee Email Account
- Collect identity card
In Emeron HR, these standard activities can be tracked in the Employee Separation Template. To access Employee Separation, go to:
Human Resources > Employee Lifecycle > Employee Separation
1. Prerequisites #
Before creating an Employee Separation, it is advisable that you create the following documents:
- Employee
- Department
- Designation
- Employee Grade
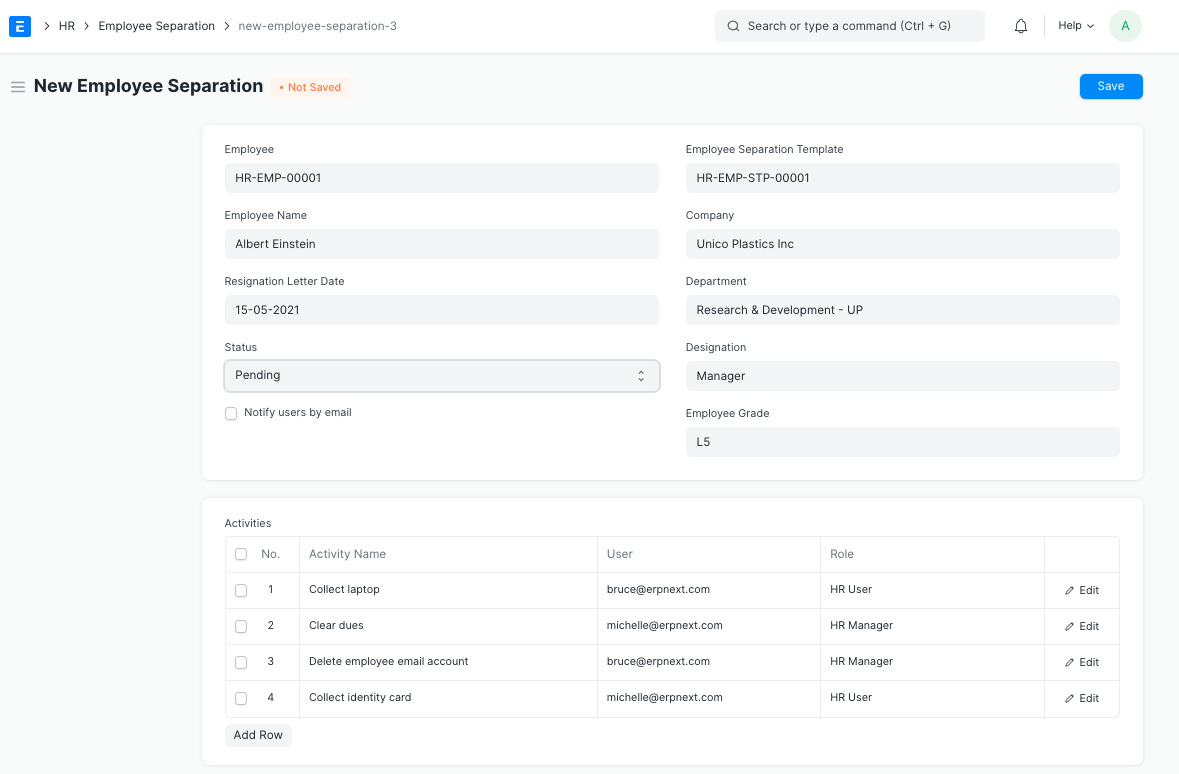
2. How to create an Employee Separation #
- Go to: Employee Separation > New.
- Select the Employee. Once the Employee is selected, the corresponding Employee information such as Department, Designation and Employee Grade will automatically get fetched.
- Select the Employee Separation Template. Based on the template selected, information such as Department, Designation and Employee grade will be automatically fetched (if already mentioned in the Separation Template).
- Enter the Resignation Letter Date.
- Additionally, you can also enter the Exit Interview Summary.
- Save and Submit.
Note 1: If an Employee Separation Template isn’t created, you can directly fill the separation information in the Employee Separation doctype itself.
Note 2: The ‘Status’ of the Employee Separation will change to Completed once all the associated Activities are complete.
3. Features #
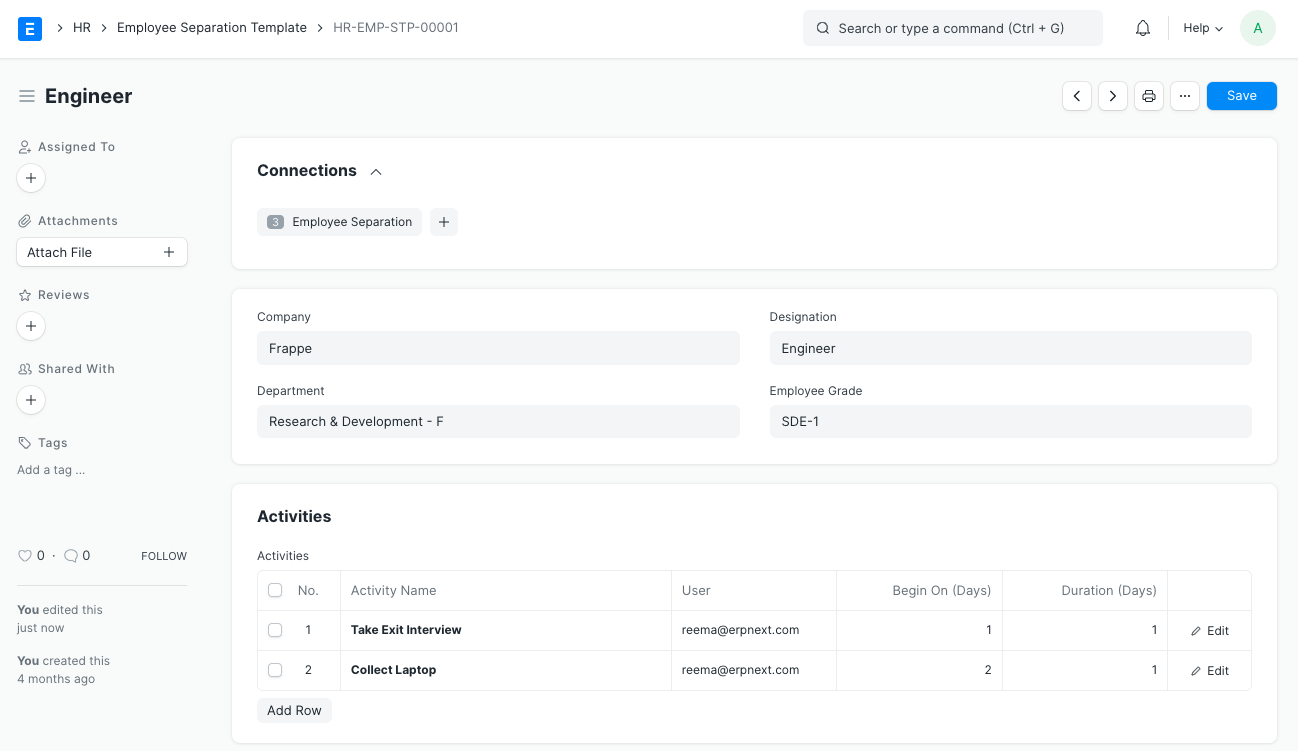
3.1 Employee Separation Template #
The Employee Separation Template is a blueprint which contains a predefined list of Activities for Employee Separation. An Employee Separation Template can be created for a particular Department, Designation and Employee Grade.
To create a new Employee Separation Template:
- Go to: Human Resources > Employee Lifecycle > Employee Separation Template > New.
- Enter the Department, Designation and Employee Grade (optional).
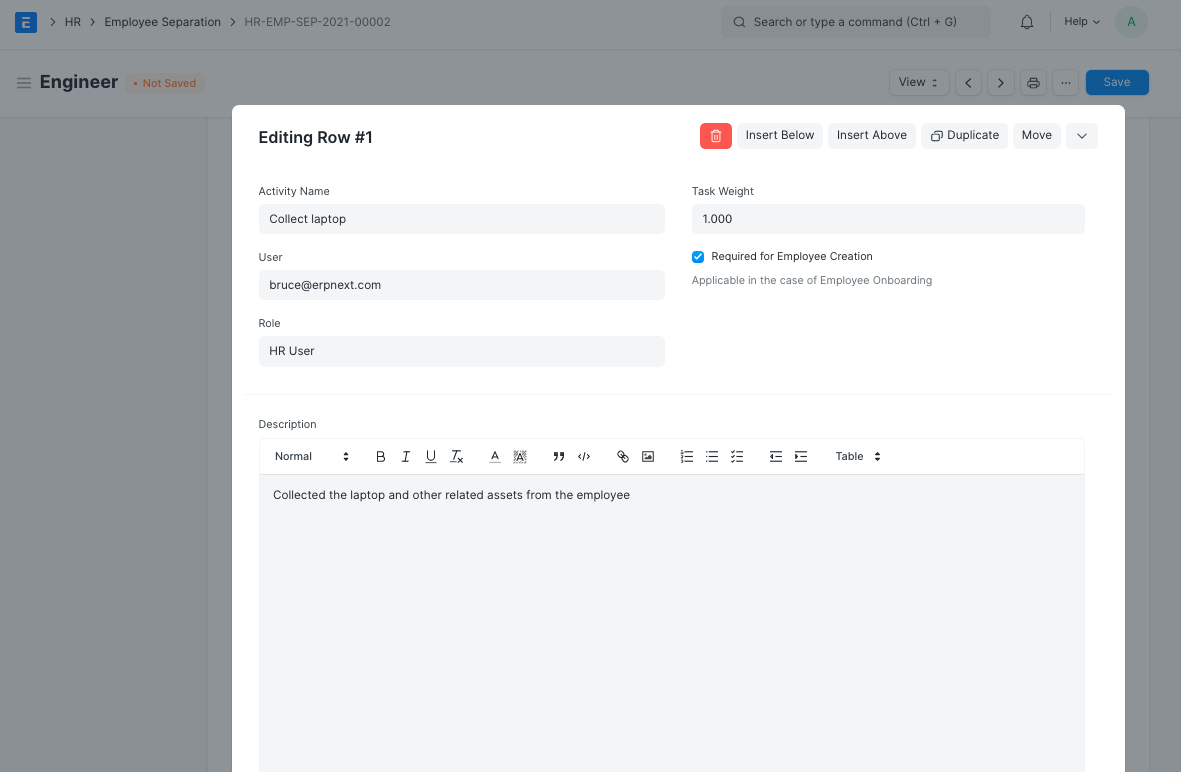
- Mention the Activities for separation. For each Activity, you can also mention the User or Role, or one of it, to whom this Activity will be assigned.
- You can also schedule the Separation Activities by specifying the Begin On (Days) i.e. when the activity has to start and the Duration (Days) for the same.
3.2 Tasks and Assignments #
On submission of the Employee Separation, a Project will be created. Within the Project, Tasks will also be created for each Activity. If you have set the date and duration against activities, tasks will be created with appropriate Start and End Date excluding holidays.
You can view the created Projects and Tasks through View > Project/ Tasks.
Additionally, each Activity can be assigned weights based on its importance.
Based on the progress on the Tasks, progress can be updated in the Employee Separation process.
3.3 Employee Status #
You can directly view the separated Employee through the Employee Separation doctype through View > Employee once the form is submitted.
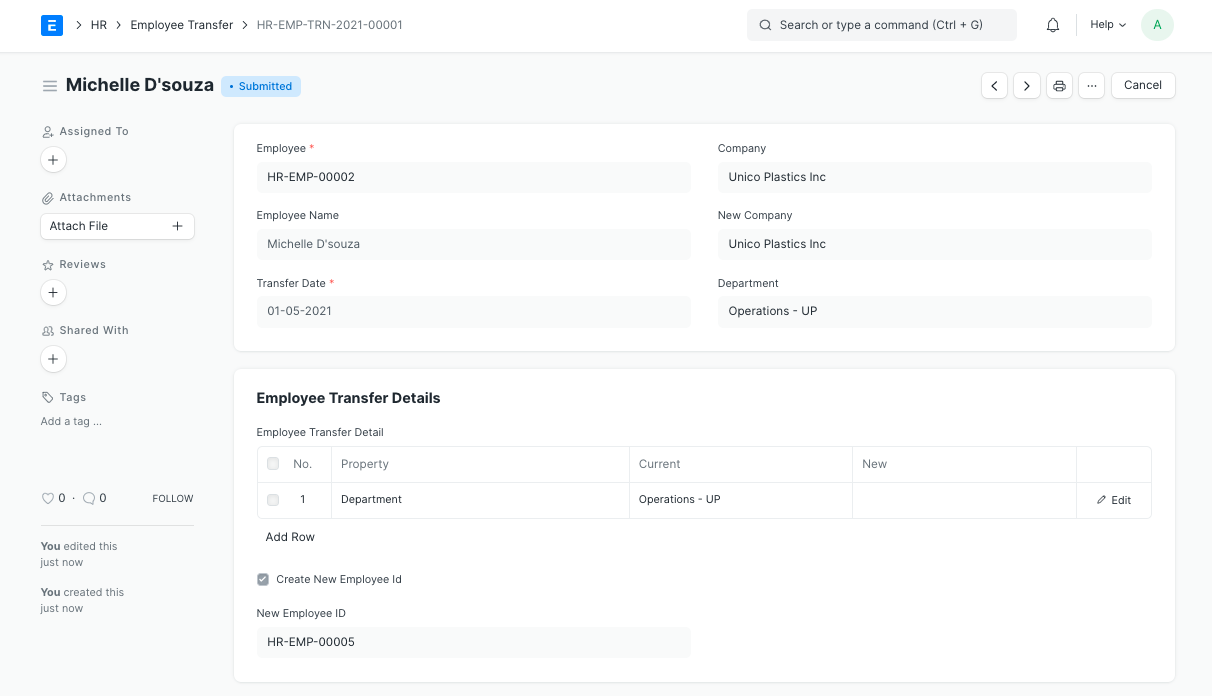
Employee Transfer #
Employee Transfer is a form of internal mobility, in which the Employee is shifted from one job to another usually at a different location, department, or unit.
In Emeron HR, you can record Employee transfers to different Company or Department by using the Employee Transfer document.
To access Employee Transfer go to:
Human Resource > Employee Lifecycle > Employee Transfer
1. Prerequisites #
- Employee
- Department
2. How to create a Employee Transfer #
- Select the Employee.
- Select the Transfer Date.
- Select the New Company in case the Employee is transferred to a different company (optional).
- In the Employee Transfer Details table, select the Property and set the Current and New value.
- Additionally, ‘Create New Employee’ checkbox can be checked to create a new Employee ID for the transferred Employee.
Note: If Create New Employee ID is checked, a new Employee will be created with property changes in Transfer Details table and old Employee will be marked as relieved. Leave allocations for the new Employee has to be manually created from Leave Period.
Note: Transfer document can be submitted on or after Transfer Date. Once submitted all the changes added to Transfer Details table will applied to Employee.