

A Tax Category allows applying one or more Tax Rules to transactions based on various criteria.
If you want to apply different kinds of taxes based on Tax Categories, create Tax Categories from:
Home > Accounting > Taxes > Tax Category
1. Prerequisites #
Before creating and using a Tax Category, it is advised to create the following first:
- Tax Rule
2. How does a Tax Category work #
Creating a Tax Category is simple, go to the Tax Category list, click on New and enter a name.
- A Tax category can be linked to one or more Tax Rules.
- This Tax Category can be assigned to a Customer, so when that Customer is selected, the Tax Category will be fetched. This also applies in case of a Supplier.
- This will fetch the Sales Tax Template linked to the Tax Rule. Hence, the rows in the Tax table will be automatically filled.
- Tax Category can be used to group Customers to whom same tax will be applied. For example, Government, NGO, commercial, etc.
Tip: One Tax Category can be assigned to multiple Tax Rules. So you can create different combinations to apply taxes automatically to transactions.
3. Assigning Tax Category #
Tax Category is automatically determined in a transaction by either the Party Address or Party Master (Customer/Supplier). You can assign Tax Category based on:
- Customer
- Supplier
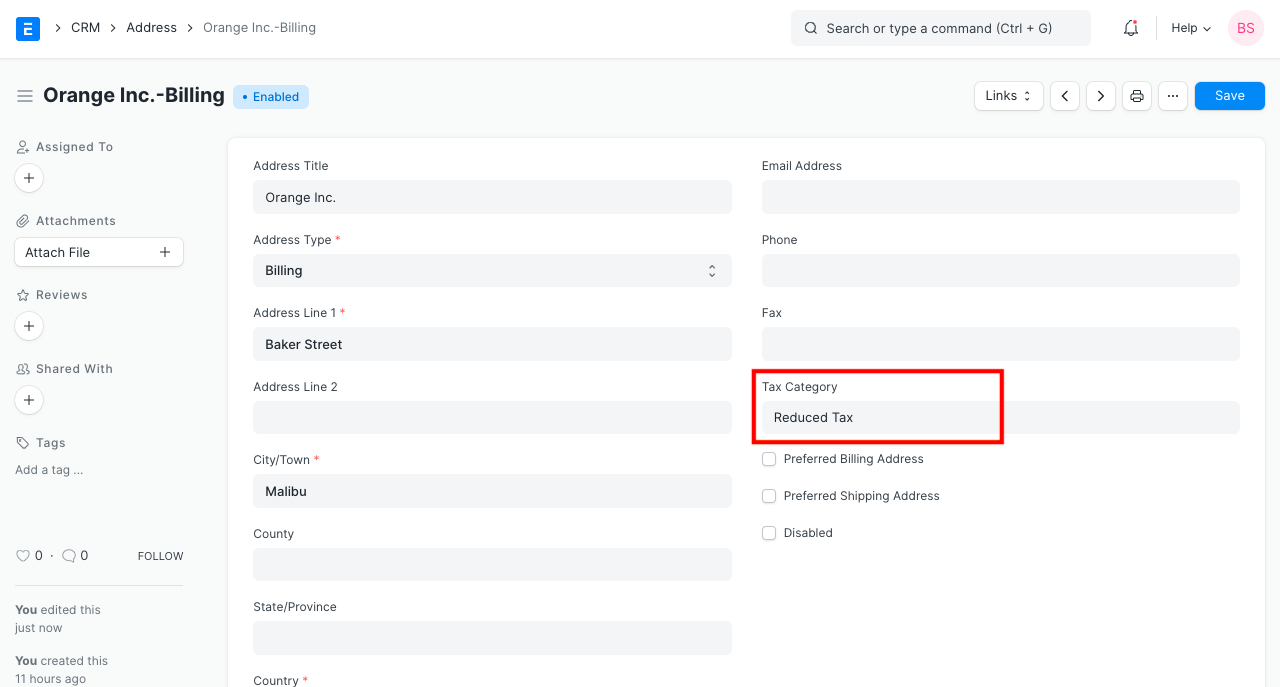
- Address Billing or Shipping. You can select whether Billing Address or Shipping Address gets preference by changing the ‘Determine Address Tax Category From’ option in Accounts Settings. Tax Category is determined from Party Address first. If the Address is not assigned any Tax Category, then the Party’s Tax Category is used.
- Item
- You can also manually select the Tax Category in a transaction.
4. What effect does the Tax Category have in a transaction? #
- Specific Item Tax Templates for that Tax Category are automatically set for items.
- You can create Tax Rules to automatically set a specific Sales / Purchase Taxes and Charges Template based on different Tax Categories in transactions.
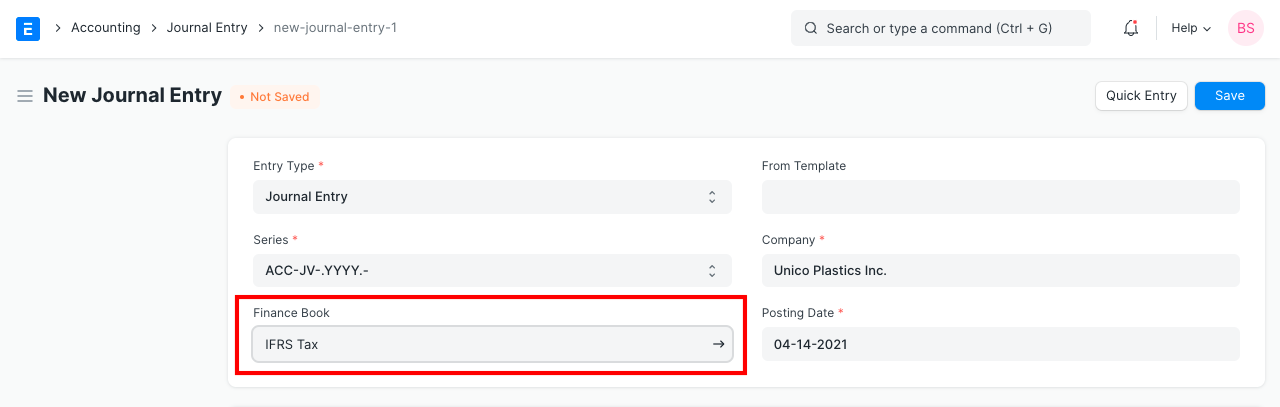
Finance Book #
A Finance Book is a book against which all the accounting entries are recorded.
You can have multiple finance books. For example, one book for tax authorities and another for stockholders. This is useful if you have to report depreciation and other values in different ways based on regulatory requirements. You can also use this to post alternate balance sheets for your internal reporting.
Finance Book is not a mandatory setup. But if you choose to create multiple Finance Books, then you can make entries against a specific Finance Book by selecting that book in Journal Entry. If a Finance Book field is blank in a Journal Entry that means the entry will be available in all finance books.
Many a times, for fixed asset depreciation, a Company may use different depreciation methods (Straight Line / Written Down Value / Double Declining Balance) for different finance books. You can set up different depreciation schedules for each Finance Book. Then, automatic depreciations will booked against that Finance Book according to the schedule.
Tax Rule #
A Tax Rule automatically applies taxes to transactions based on preset rules.
You can define which Tax Template must be applied on a Sales / Purchase transaction using Tax Rule. This is decided by various factors like Customer, Customer Group, Supplier, Supplier Group, Item, Item Group or a combination of these.
To access the Tax Rule list, go to:
Home > Accounting > Taxes > Tax Rule
1. Prerequisites #
Before creating and using a Tax Rule, it is advised to create the following first:
- Sales Taxes and Charges Template
Or
2. How to create a Tax Rule #
- Go to the Tax Rule list and click on New.
- Under Tax Type select whether the tax will be applied at Sales or Purchase.
- Select the Tax Template to be applied.
- Save.
You can list Items online using the Website module. Selecting ‘Use for Shopping Cart’ will use this Tax Rule for Shopping Cart transactions also. To know more, visit the Shopping Cart page.
Note: It is advised to not use the Sales/Purchase Template selected here in Item Tax Template, it may cause interference. If you want to use same tax rates for Tax Rule and Item Tax Template, use a different name for the Sales/Purchase Tax Templates.
3. Features #
3.1 Auto applying Tax Rule based on Customer/Supplier #
Select a Customer/Supplier if tax is to be applied for a specific party. Leave it as All Customer Groups/All Supplier Groups if this Tax Rule is applicable to all Customers/Suppliers.
On selecting a Customer/Supplier their Billing and Shipping addresses will be fetched if saved in the Customer/Supplier master.
3.2 Auto applying Tax Rule based on Item / Item Group #
On setting an Item or Item group in the Tax Rule, this Tax Rule will automatically be applied to new transactions that have the selected Item/Item Group.
3.3 Setting a Tax Category #
Setting a Tax Category allows applying multiple Tax Rules to a transaction based on different factors. To know more, visit the Tax Category page.
3.4 Validity #
Set a Start and End Date if the tax is to be applied only for a specified period. Leaving both dates blank will result in the Tax Rule to have no time limits.
3.5 Priority #
Setting a priority number here will decide on which order a Tax Rule will be applied in case multiple Tax Rules have similar criteria. ‘1’ is the highest priority, ‘2’ has lesser priority and so on.
4. How does Tax Rule Work? #
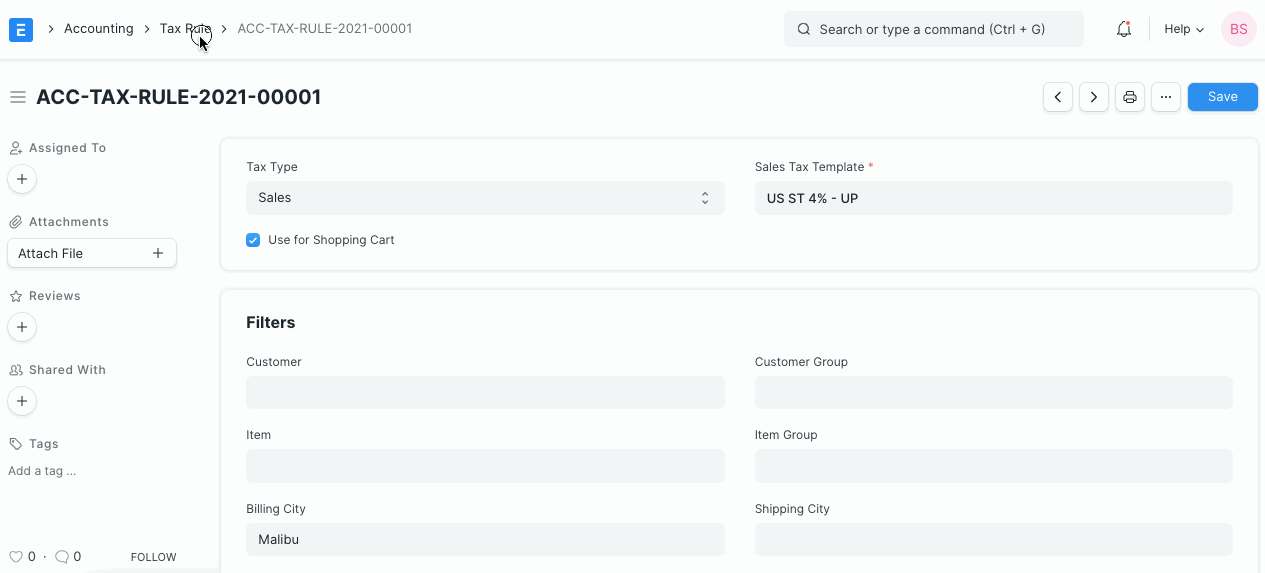
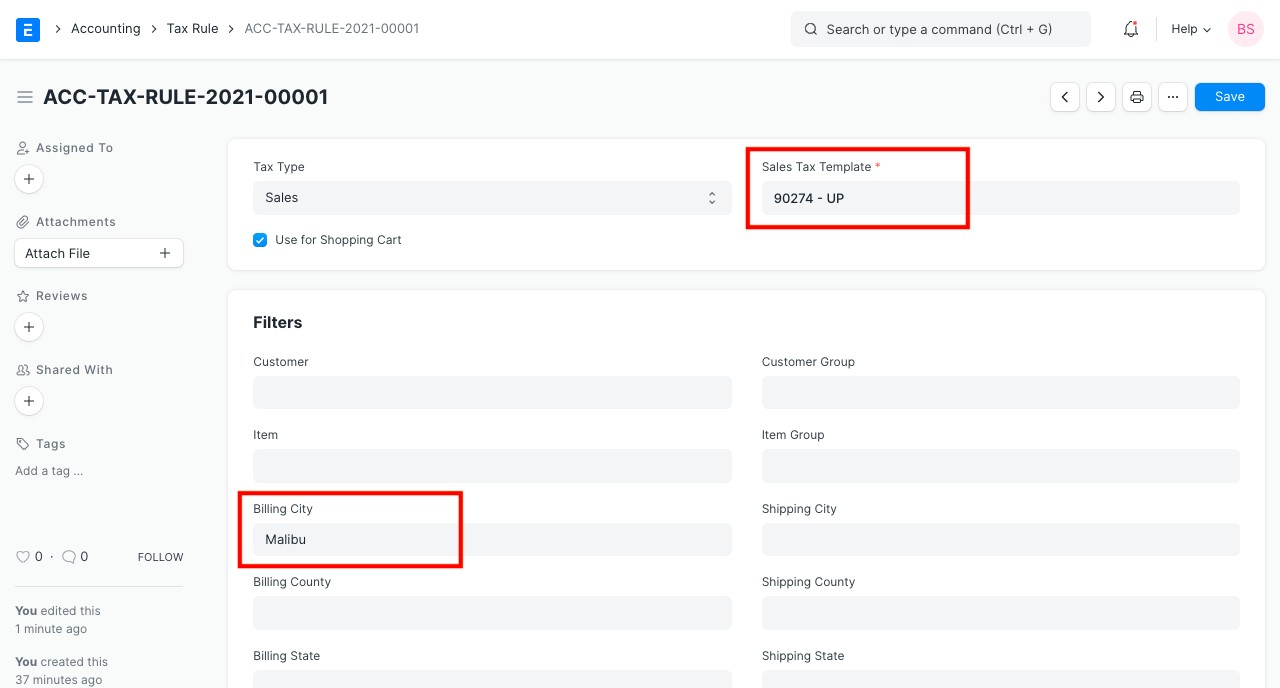
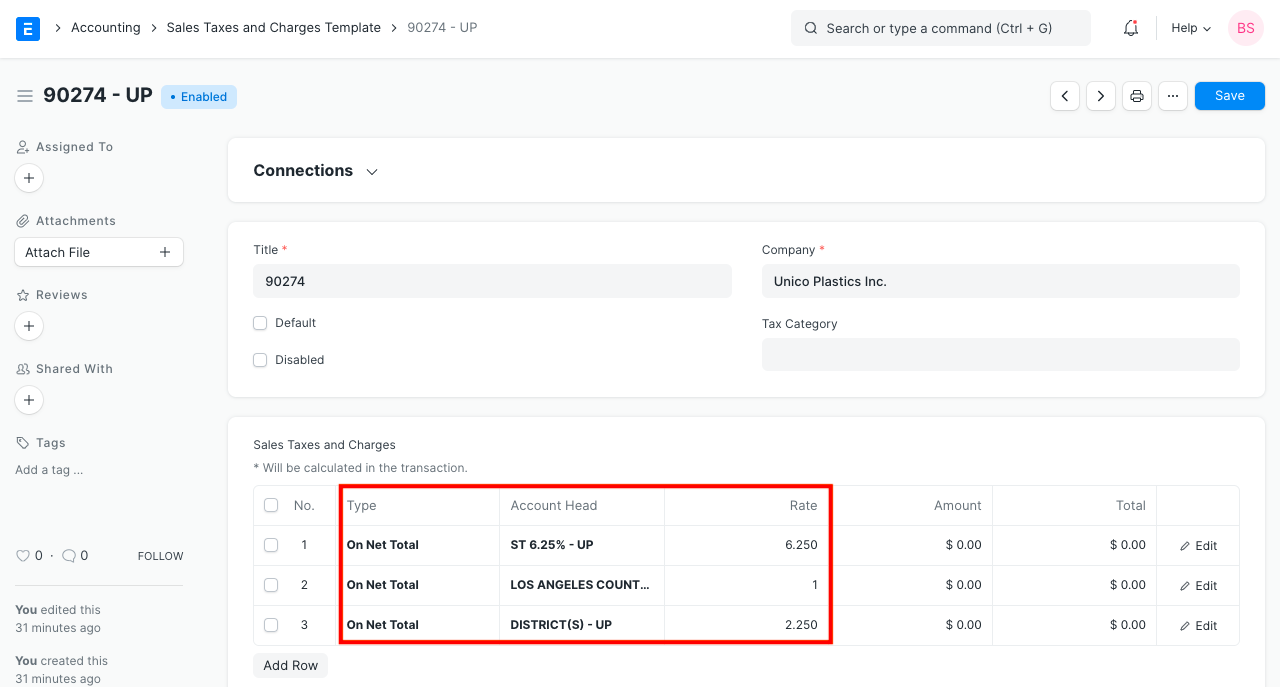
Let us configure Tax Rule so that system automatically applies specific tax rates when a specific condition matches. For example, if the city in the billing address of customer is ‘Malibu’ then a 6.25% of state tax, 1% of county tax and 2.25% of district tax should be applied.
Create a Sales Taxes and Charges Template as shown below.
Create a Tax Rule as shown below.
Once you select a customer and a billing address of that customer with city as ‘Malibu’, system automatically applies the appropriate taxes.
